If you’ve ever scrambled to get regular content published to your brand’s Facebook Page, you’ve probably wondered if there’s a way to schedule Facebook posts ahead of time. Well, there is!
Managing a social media content calendar becomes far more efficient when you schedule Facebook posts. Scheduling in advance can help your brand post more consistently and stay on schedule. That way, you can avoid long gaps between posts with little effort.
There are two ways you can schedule posts on Facebook:
- Natively. This method uses Facebook’s built-in posting scheduler.
- Using third-party schedulers. Publishing tools like Hootsuite can be used to schedule social media posts across platforms. Advanced features like bulk scheduling are available.
Bonus: Download our free, customizable social media calendar template to easily plan and schedule all your content in advance.
Why schedule Facebook posts?
In a nutshell, scheduling Facebook posts can help your business:
- Post regularly
- Stay on brand
- Connect with your audience
- Save time creating individual posts
- Increase your social media engagement
- Stay focused on your posting strategy
How to schedule a post on Facebook using Facebook Business Suite
First things first: You need to have a Facebook Page to schedule posts.
(Don’t have one? Find out how to create a Facebook business page in just a few steps.)
Once your Page is set up, follow this step-by-step guide to learn how to schedule future posts.
Step 1: Write your post
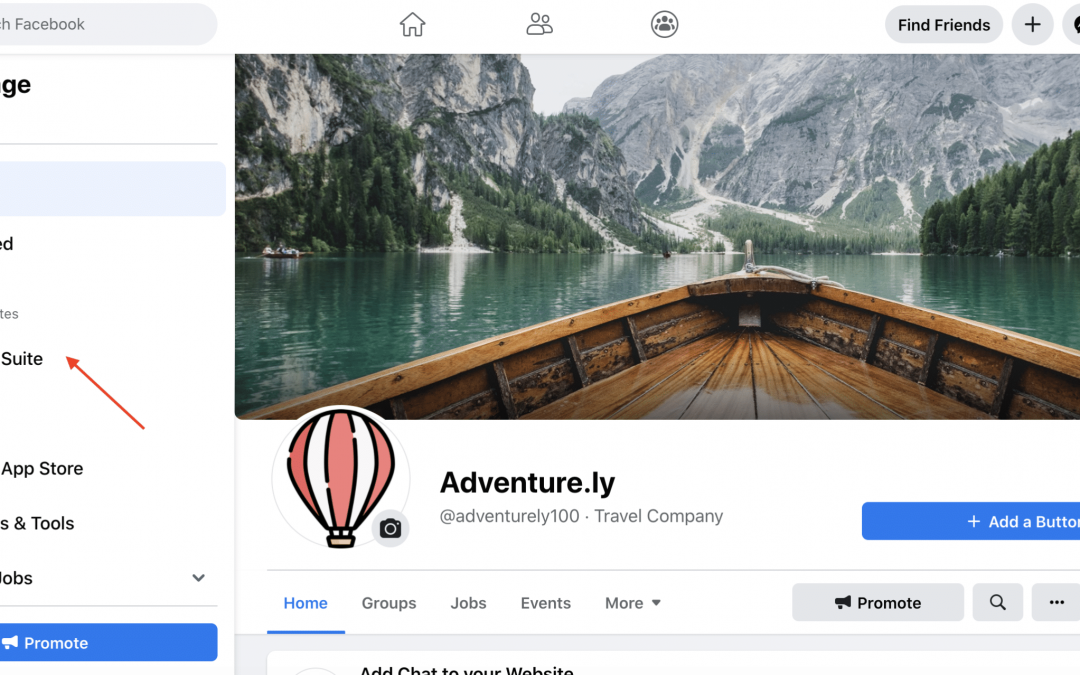
After opening Facebook to your timeline, click Pages in the top left corner of your dashboard to navigate to your business’s Facebook Page.
Then, navigate to Business Suite in the menu:
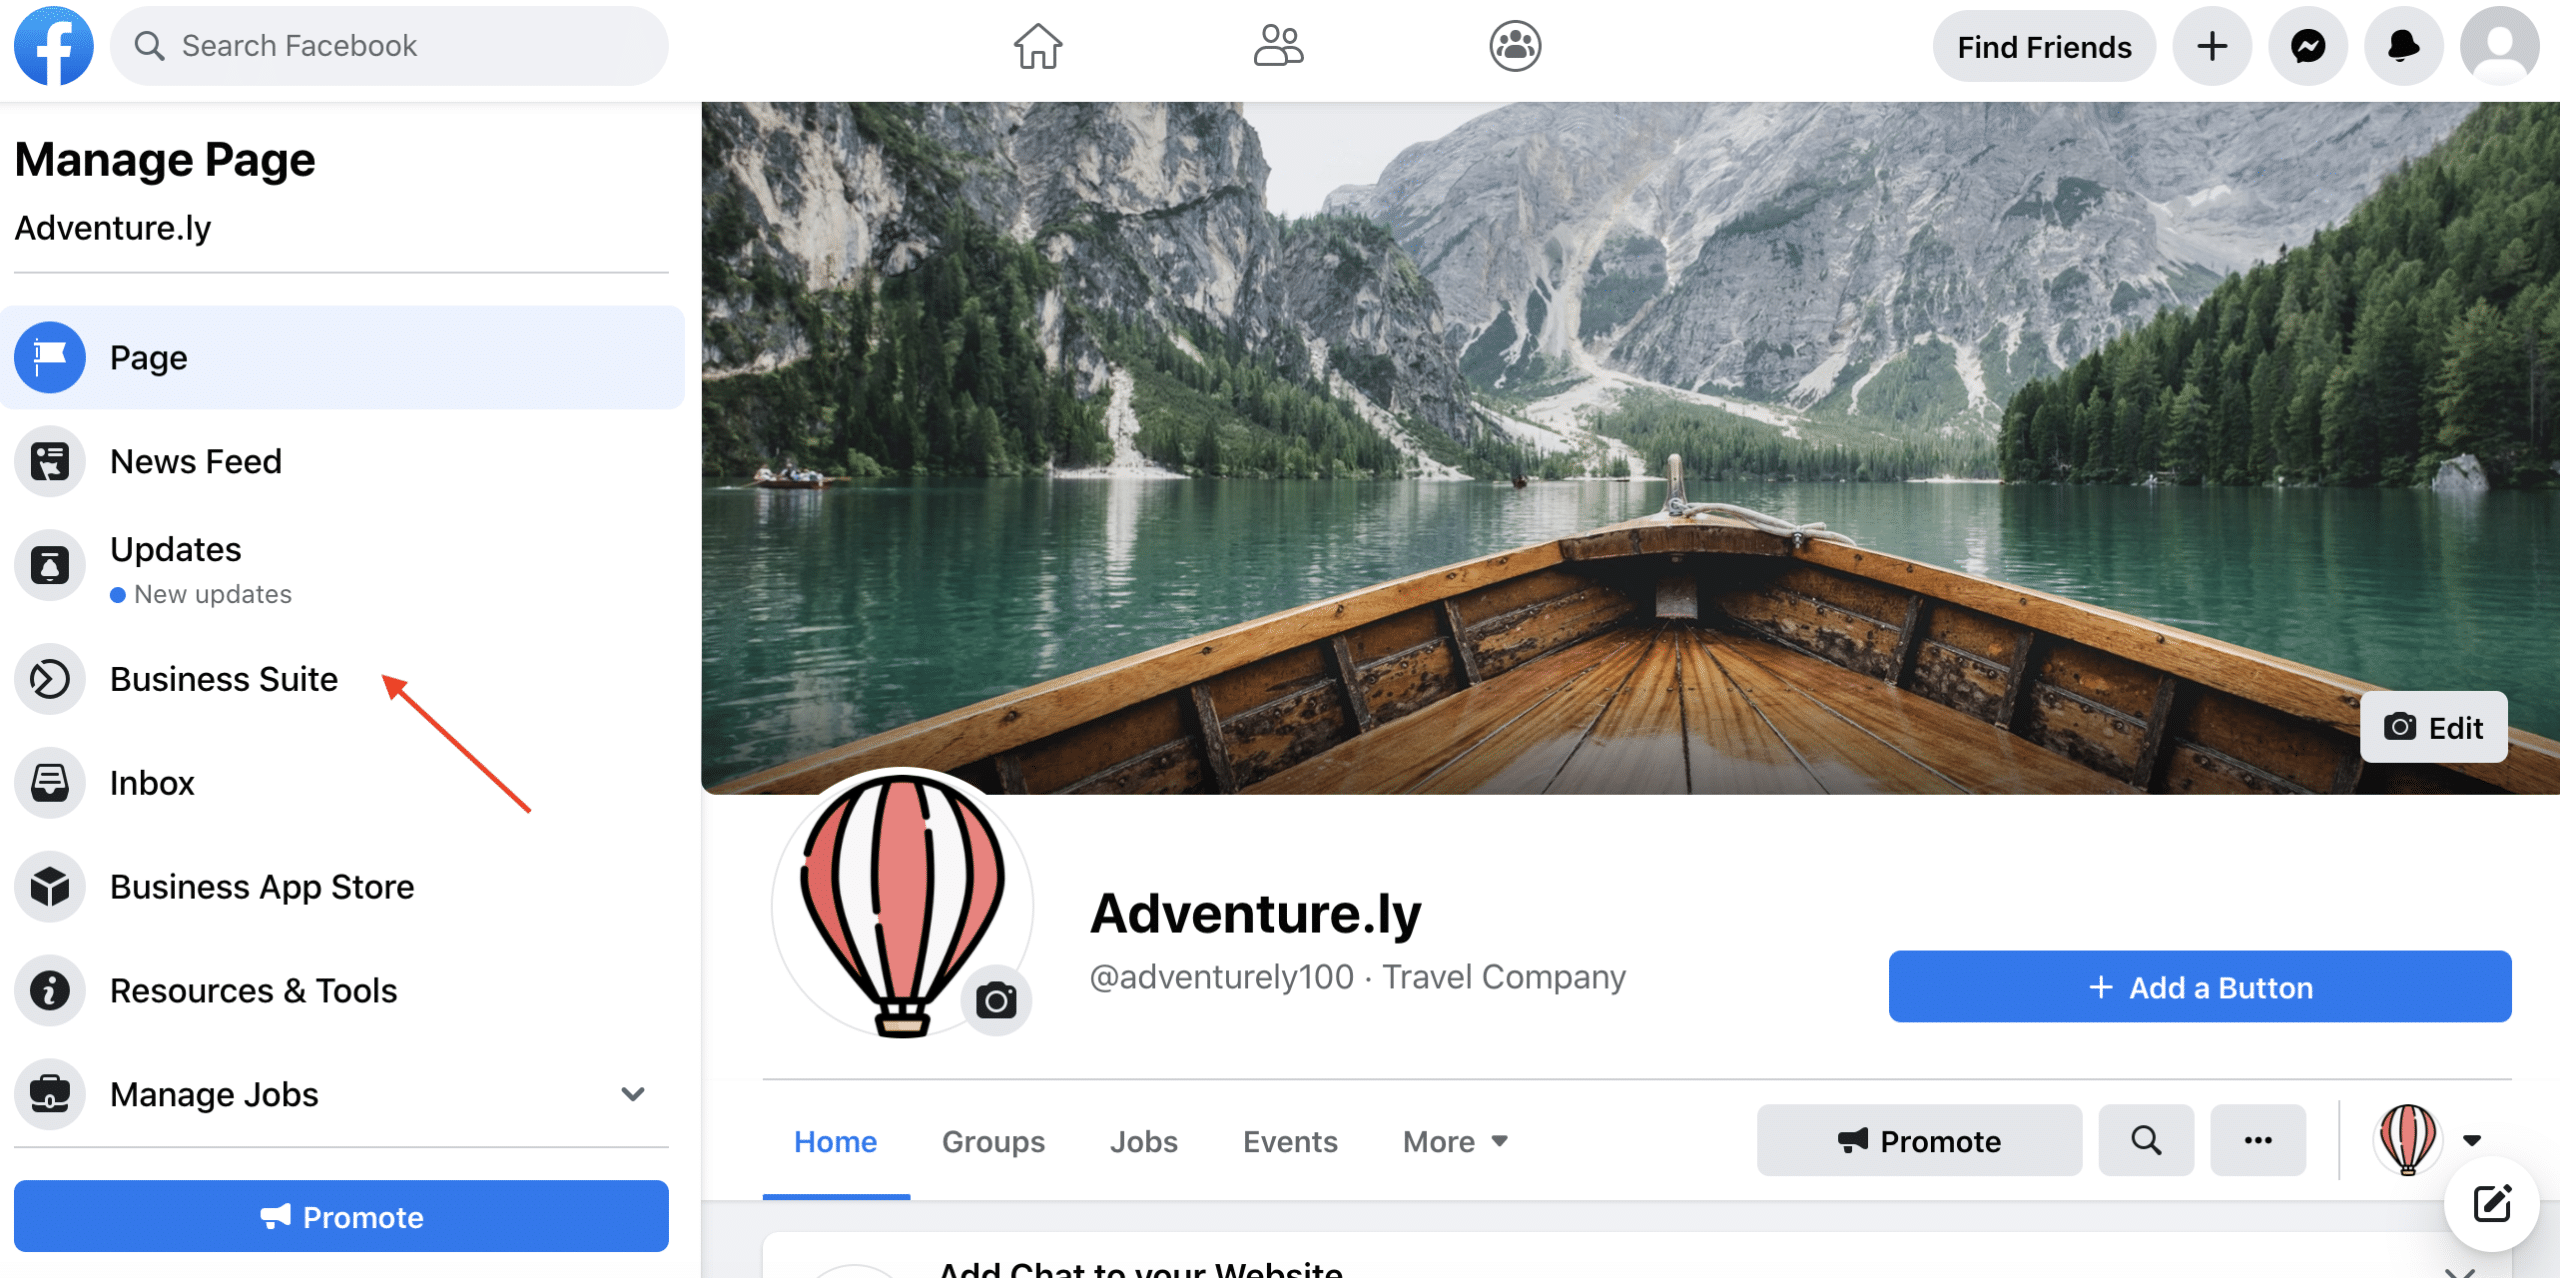
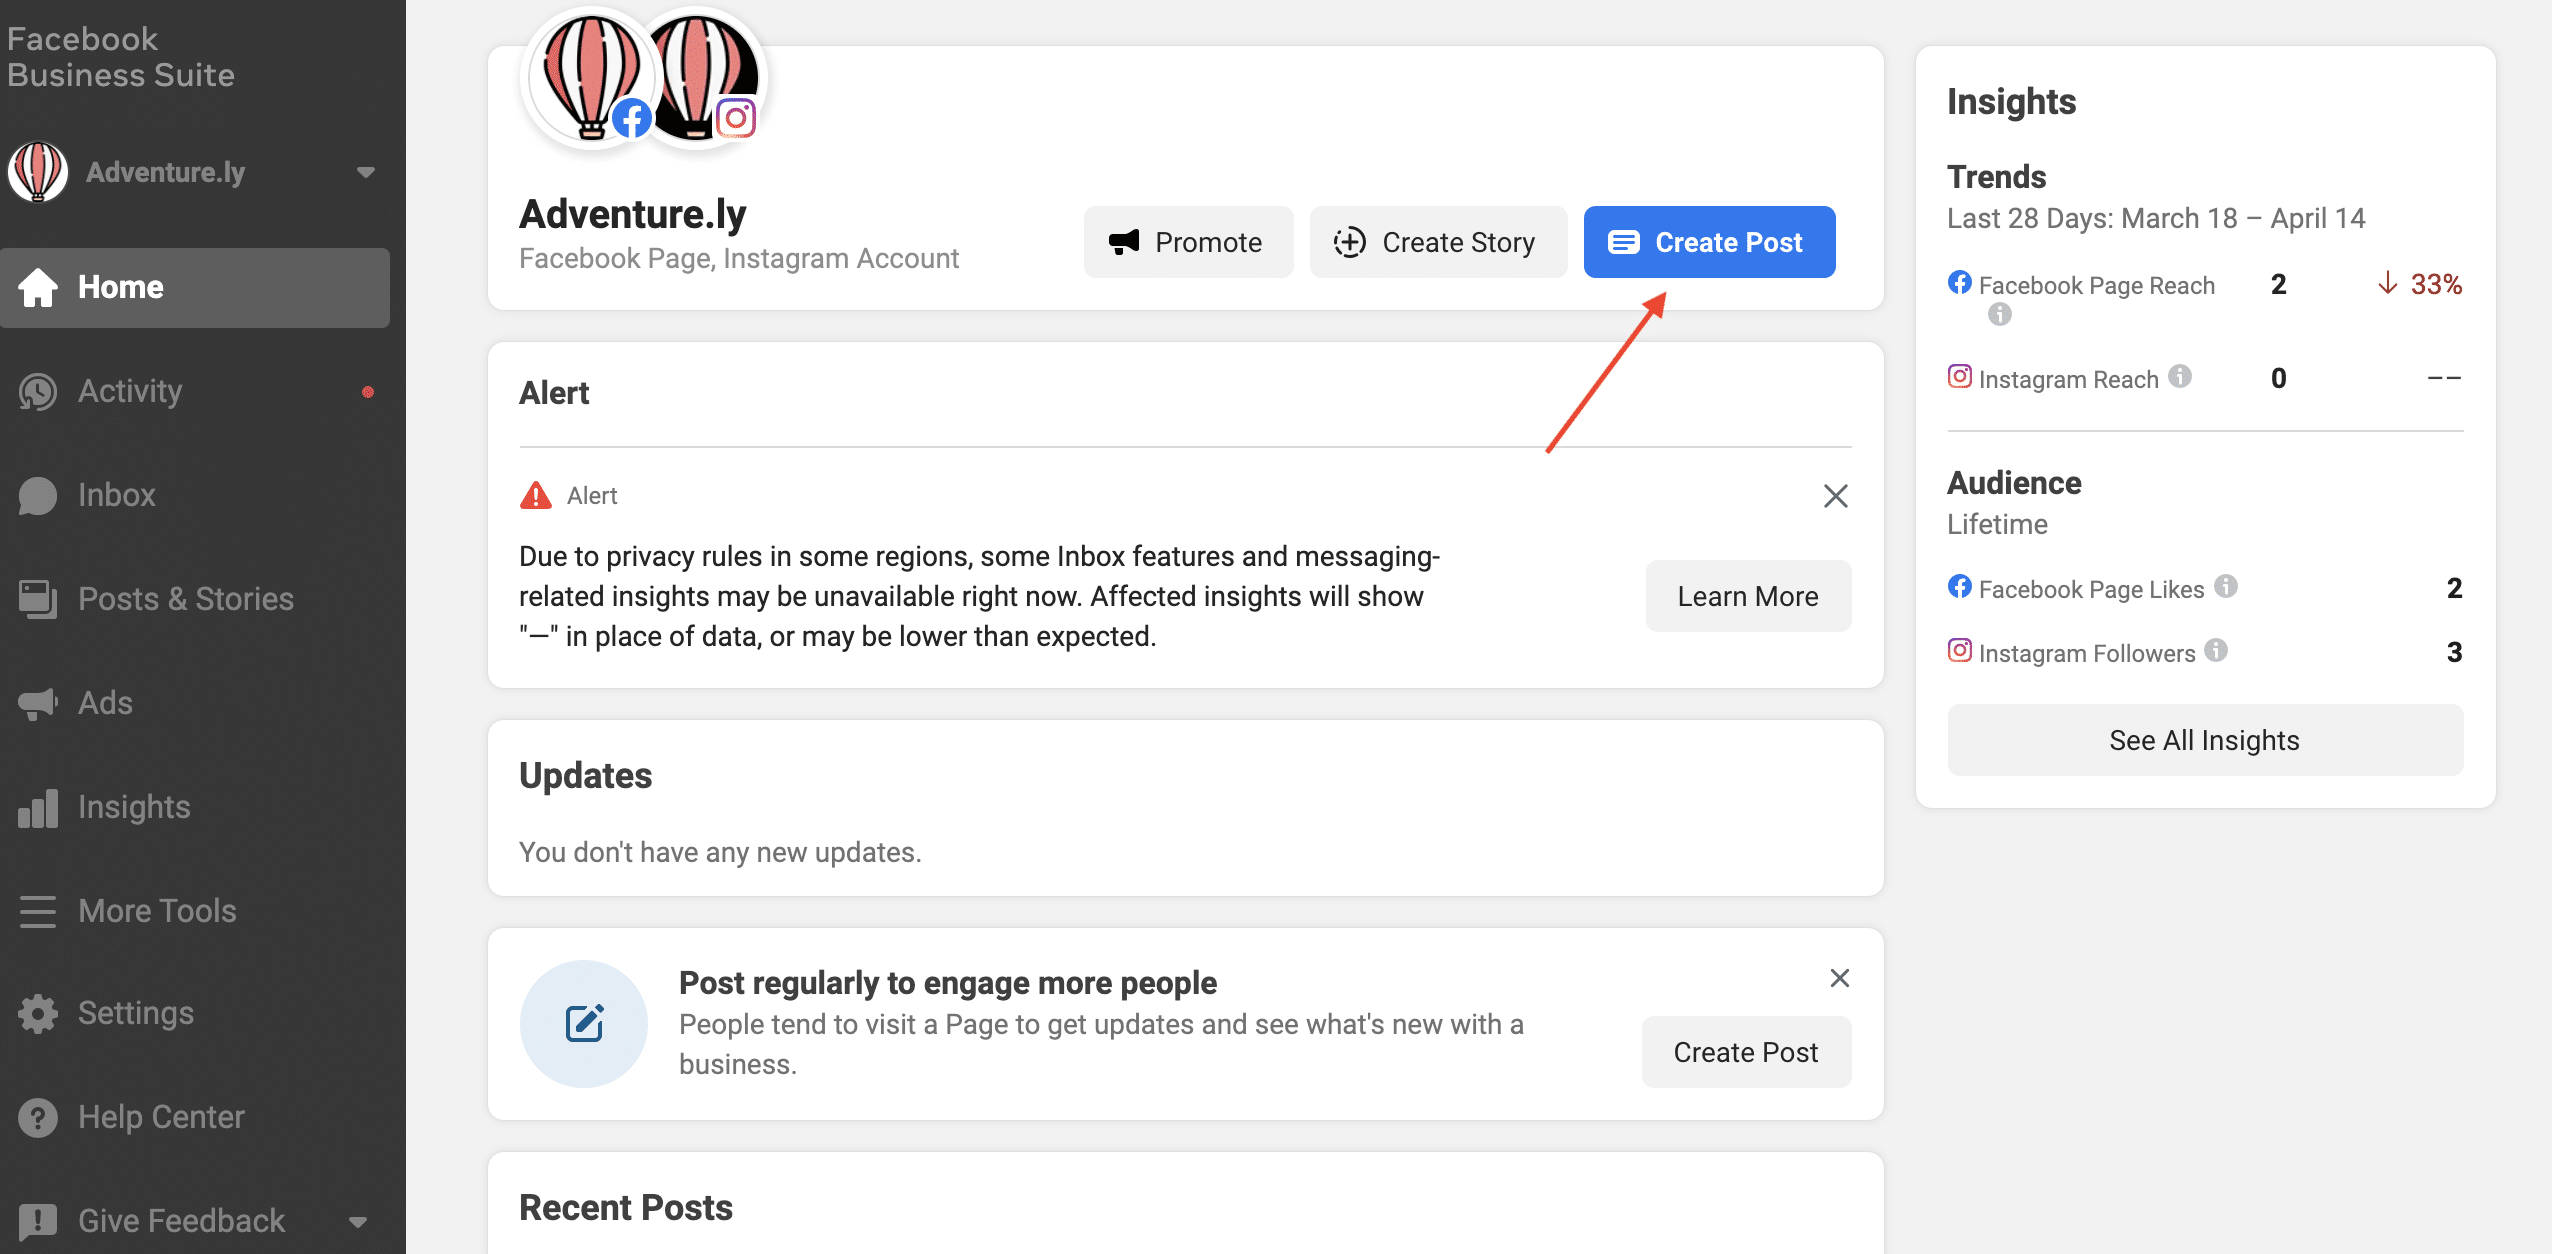
Now, click Create Post:
Need a little inspiration? We’ve got your back. Here are some tips on creating an engaging Facebook post.
Step 2: Preview the post
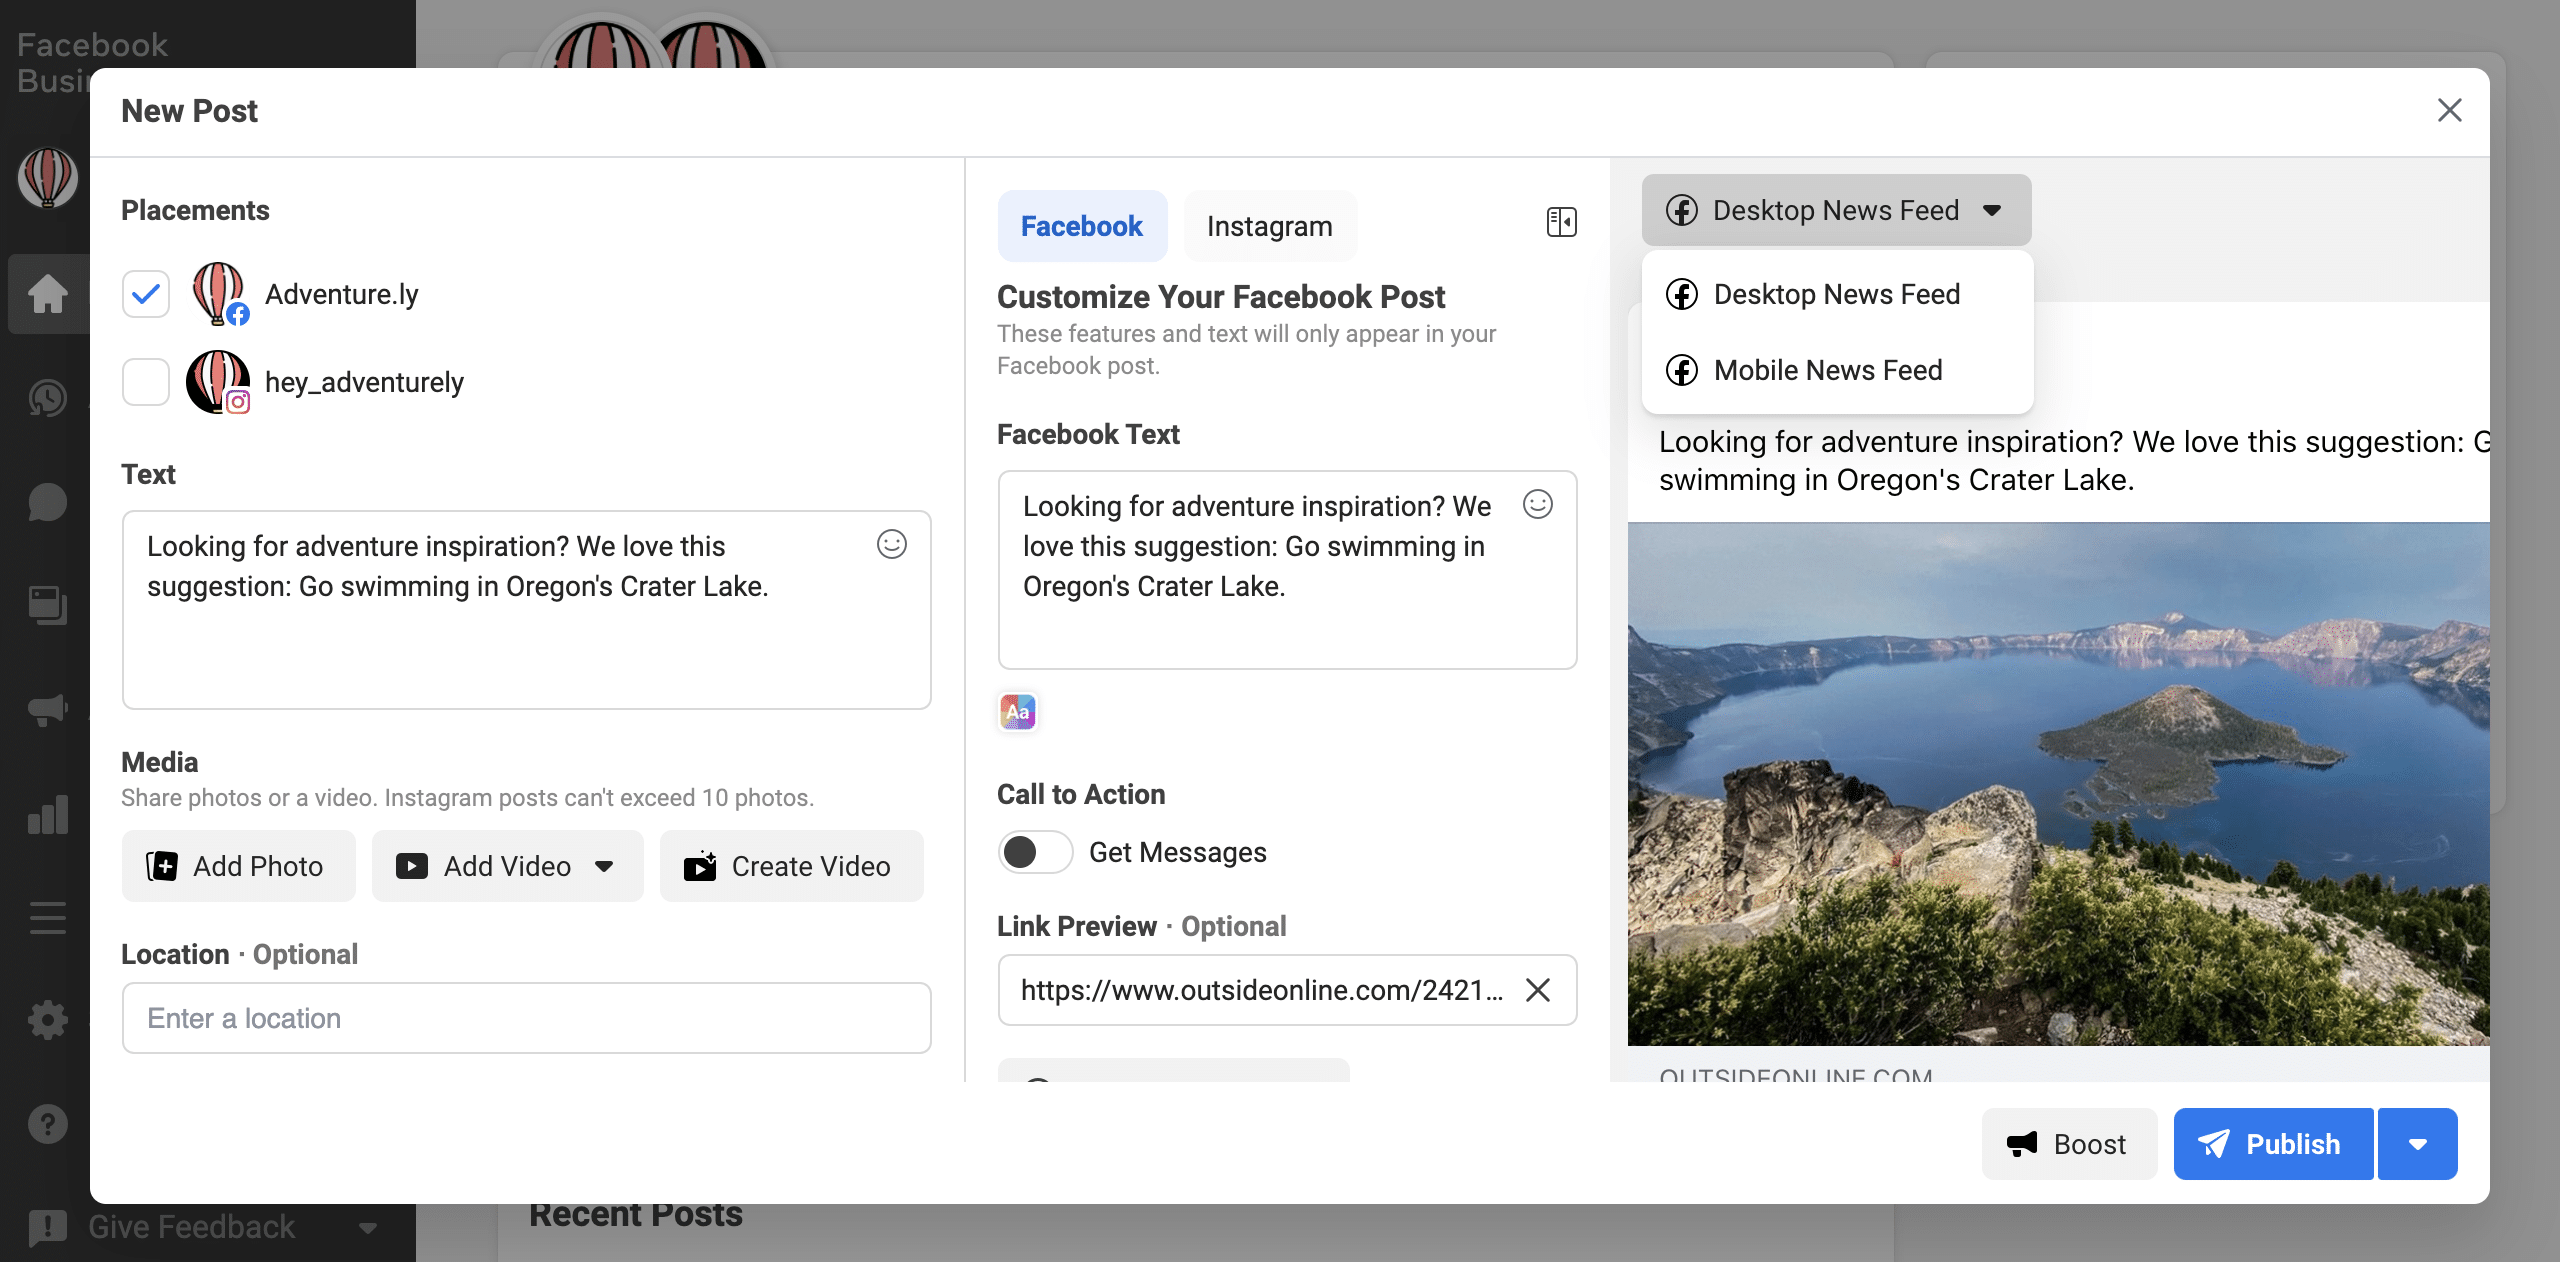
In the Placements section, select where you want your post to be published. You will be able to publish it to your Page and the connected Instagram account at the same time.
As you draft the post, you’ll be able to preview what it will look like on desktop and mobile. If anything looks off, make changes to optimize the post. This is the time to make sure those link previews are pulling correctly.
Step 3: Select a date and time
If you don’t want to publish your post right away, click on the arrow next to the Publish button at the bottom of the page.

Then, choose the day you want the post to be published, and the time it should go live.
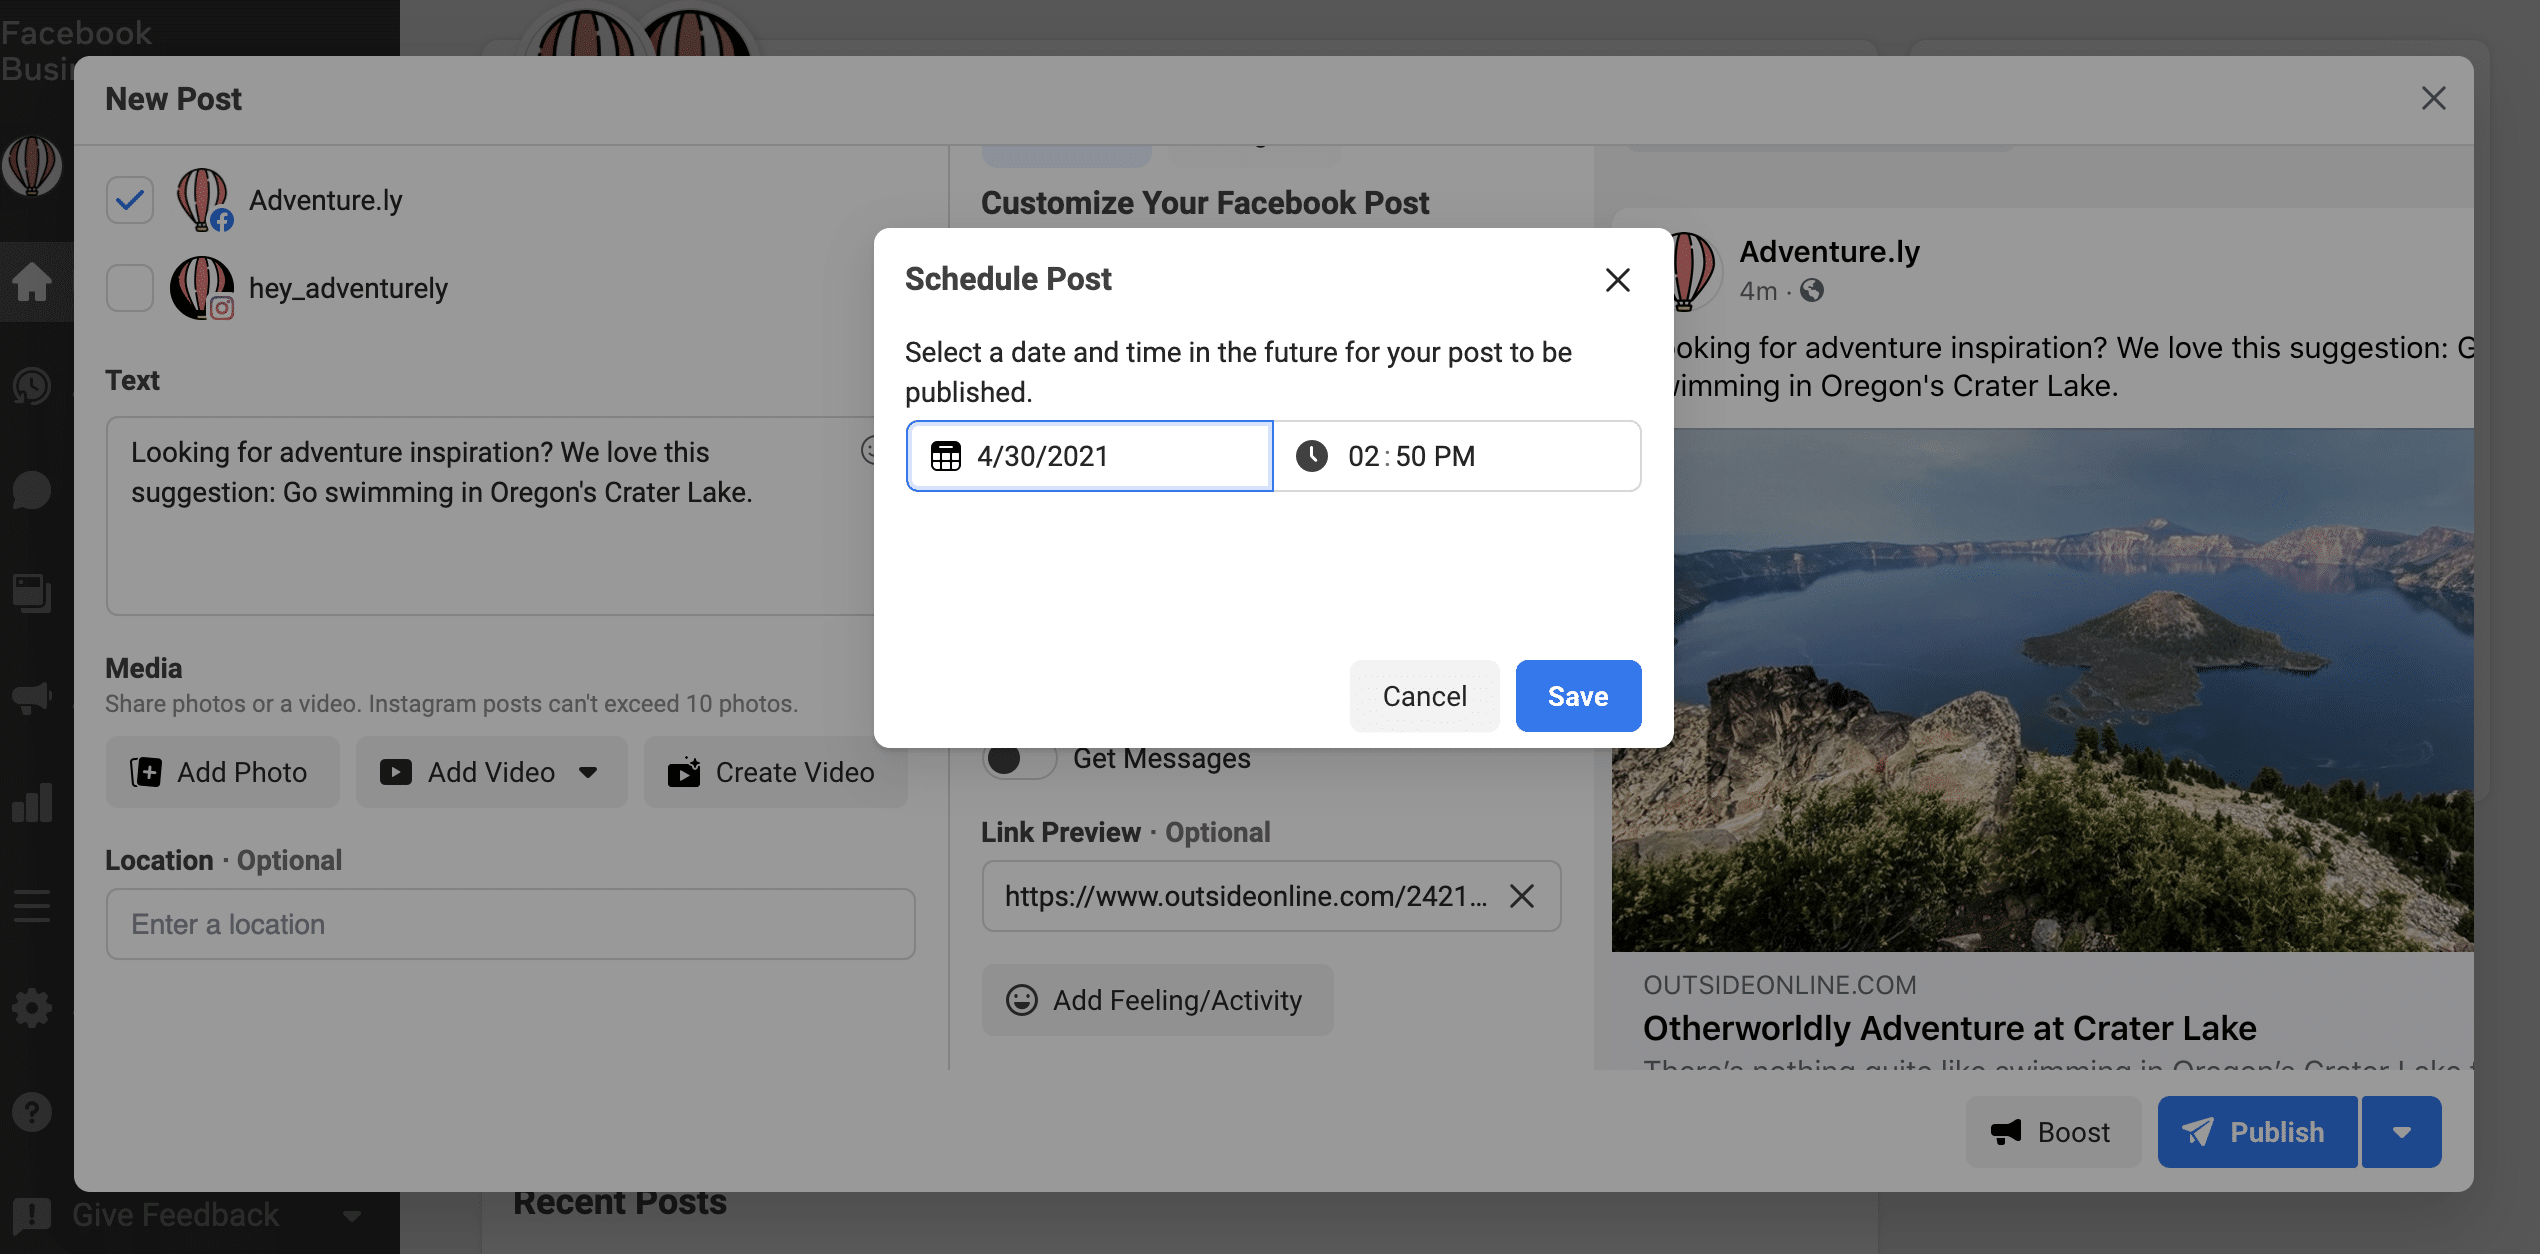
Finally, click Save.
Step 4: Schedule your post
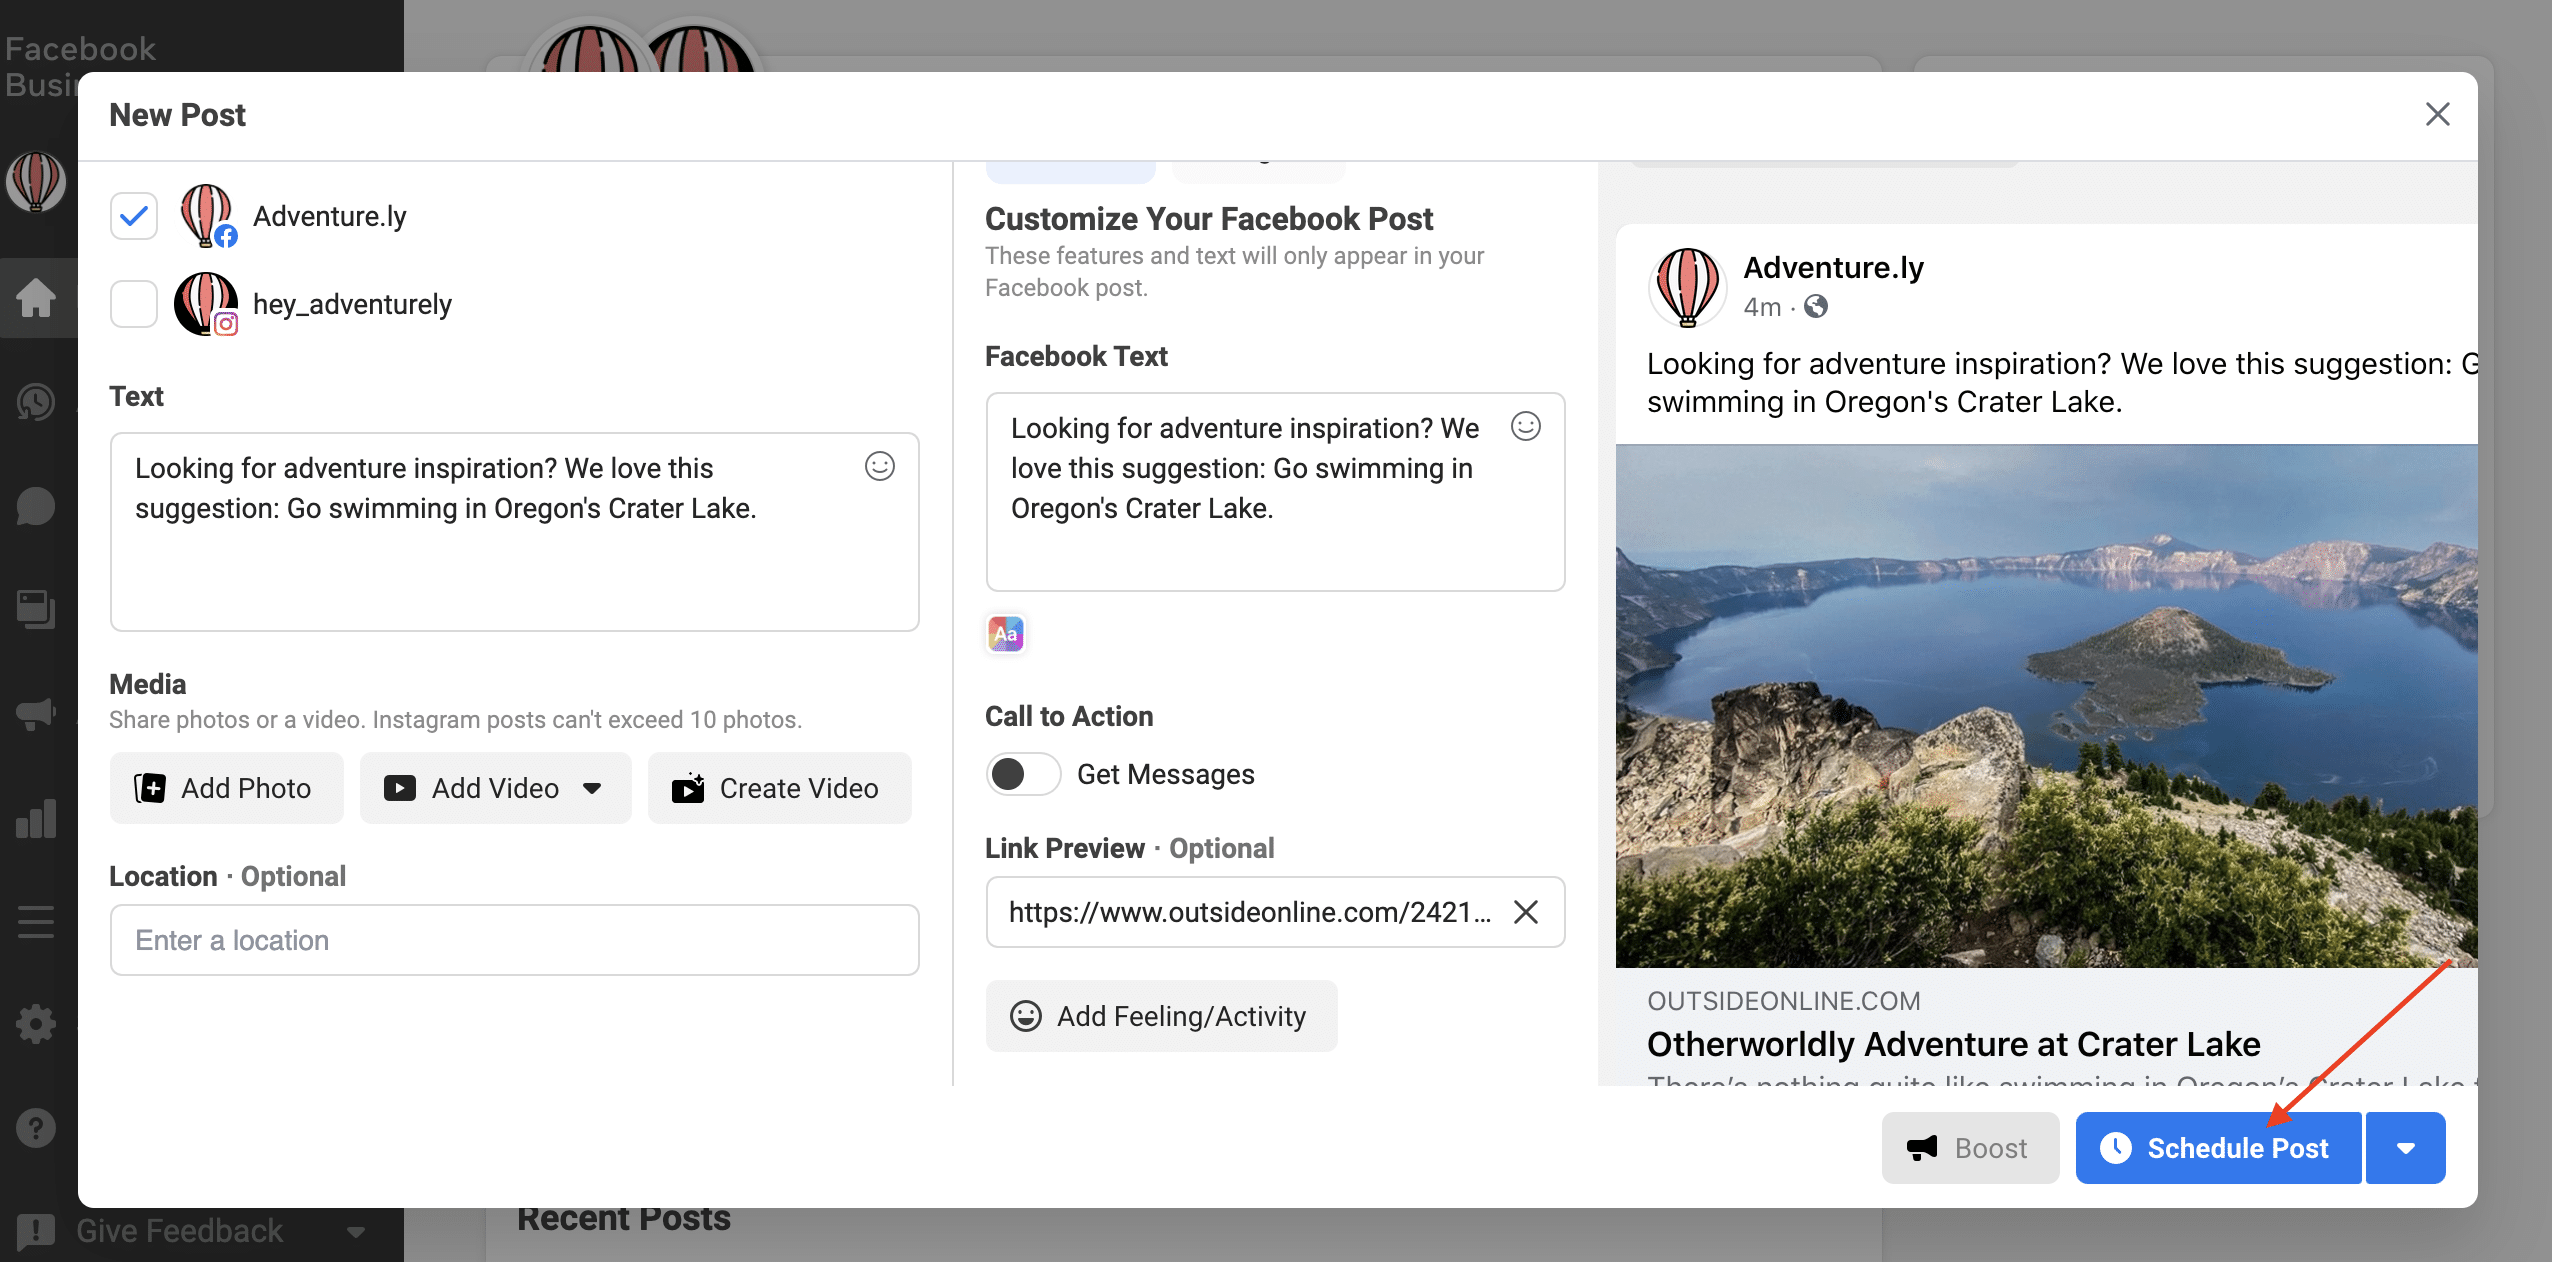
Click the blue Schedule Post button, and that’s it! Your post is now in the publishing queue. That means it’s ready to go live on the day and time you set.
How to edit scheduled Facebook posts in Business Suite
You might want to edit, delete or reschedule the Facebook posts in your queue. Here’s where you can find the queue and edit it.
- Navigate to Scheduled Posts in the Business Suite. There, you’ll see all of your scheduled posts.
- Click on the post you want to edit to view the details.
- Click on the three dots icon. You’ll see several options: Edit Post, Duplicate Post, Reschedule Post and Delete Post.
- Make your edits and click Save. By clicking the arrow next to the Save button, you can also choose to publish the post immediately or reschedule it.
It’s that easy!
How to schedule a post on Facebook using Hootsuite
Once you’ve connected your Facebook Page to your Hootsuite account, this is how to schedule Facebook posts using the app.
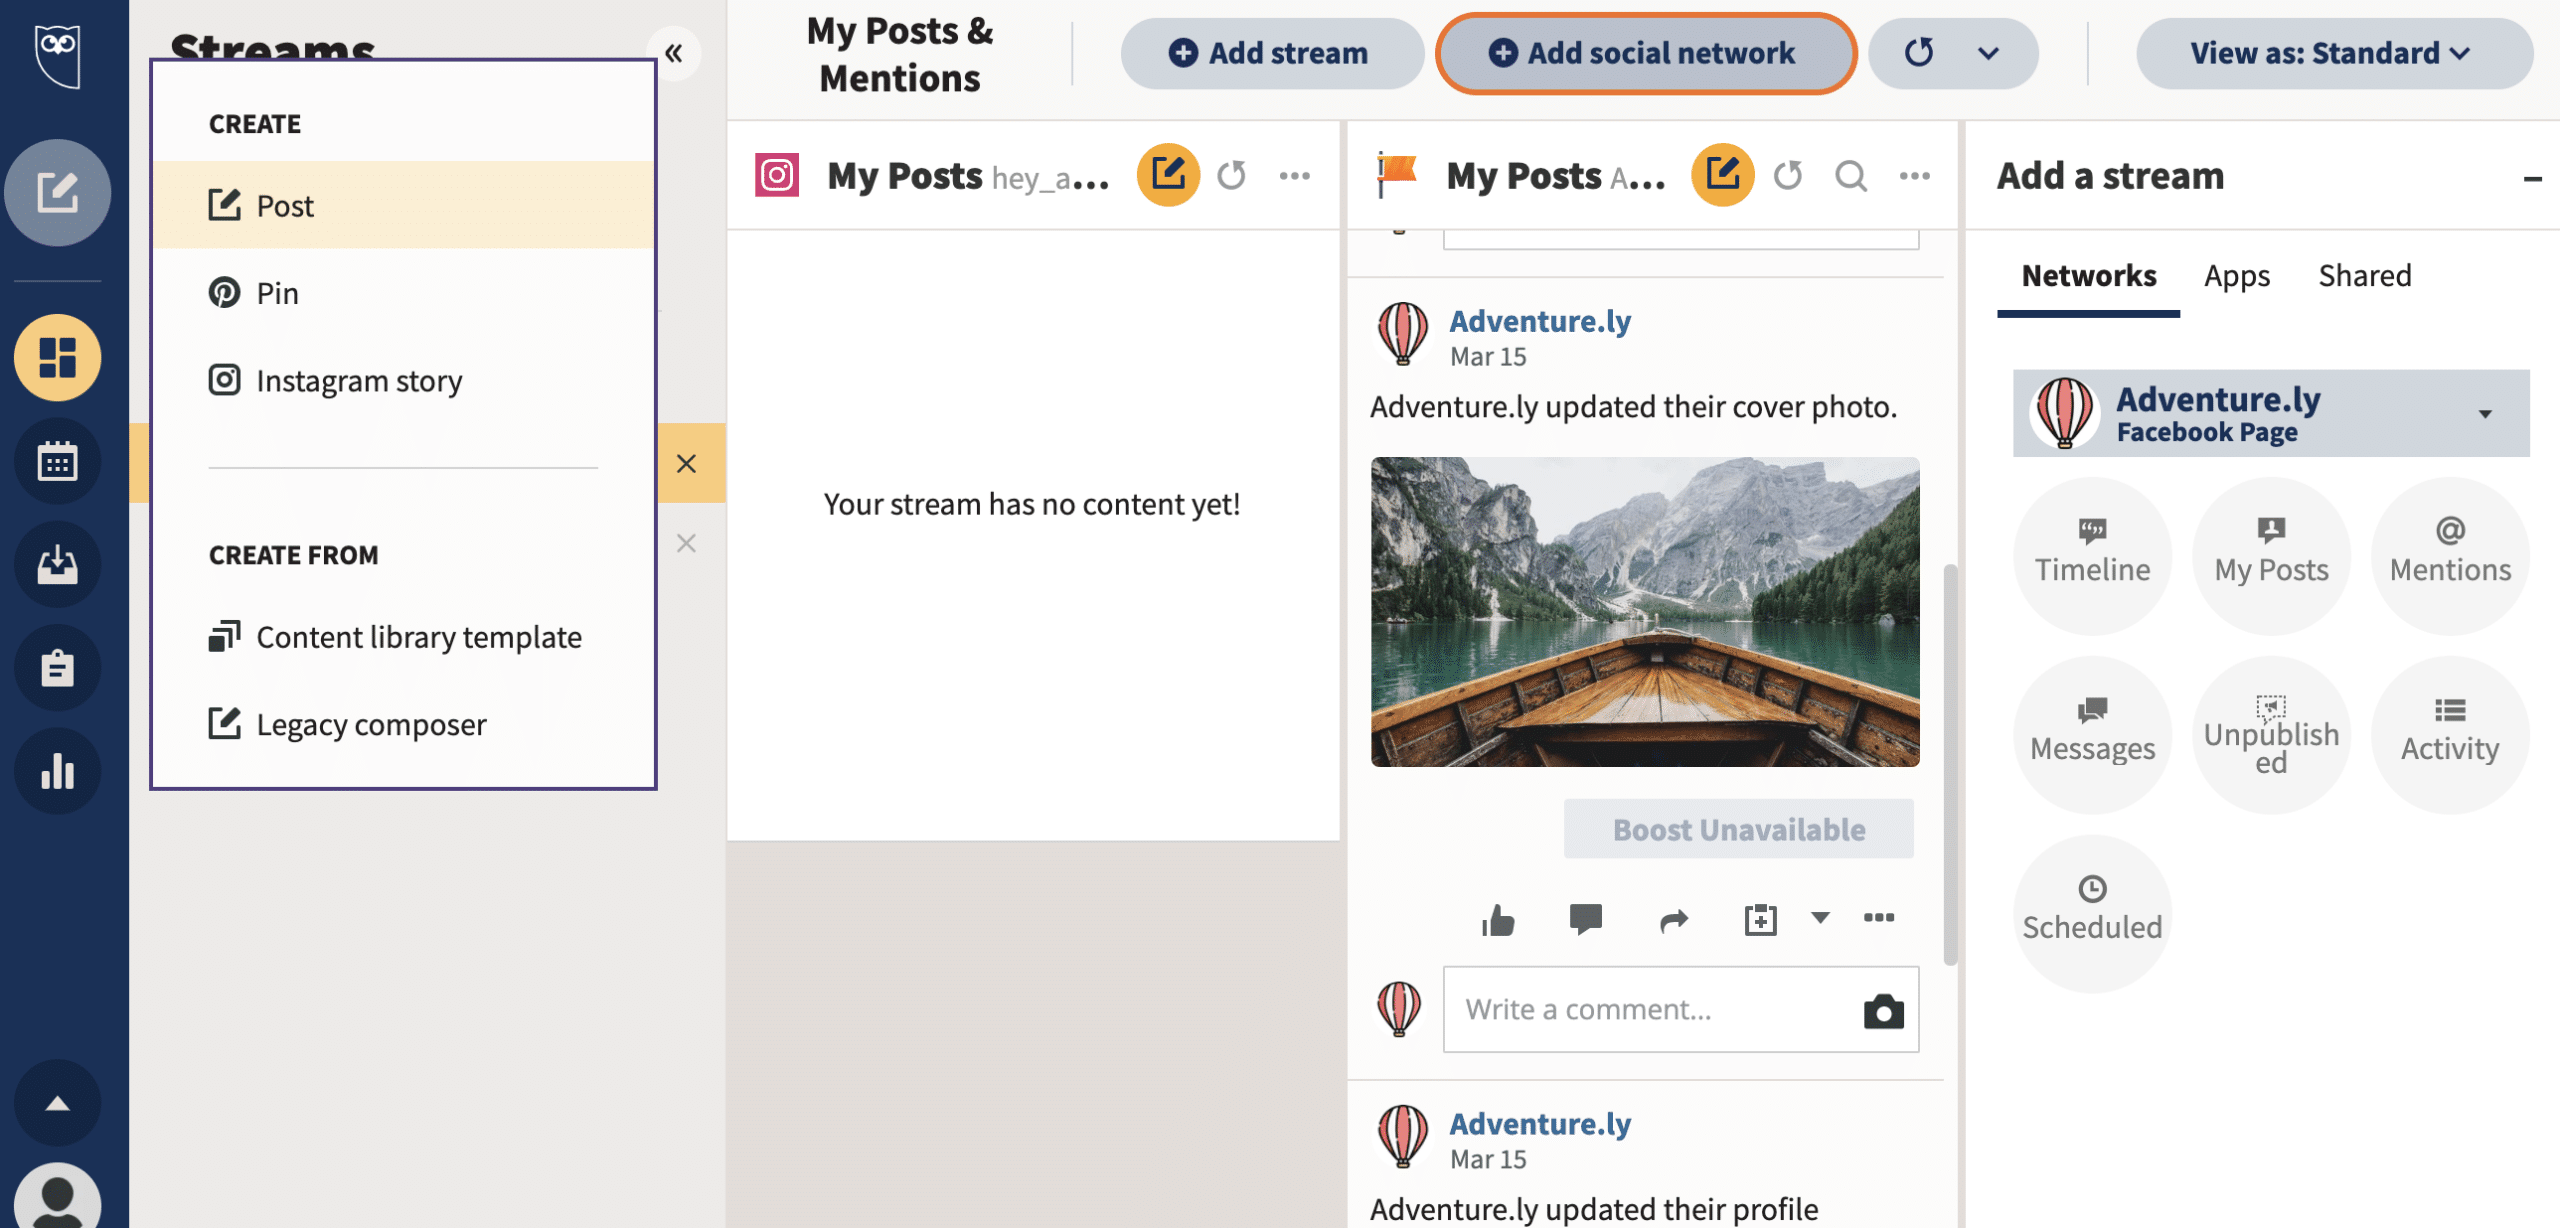
Step 1: Click Create Post
Navigate to the content creation icon in the menu on the left side of the dashboard. Then, click Post.
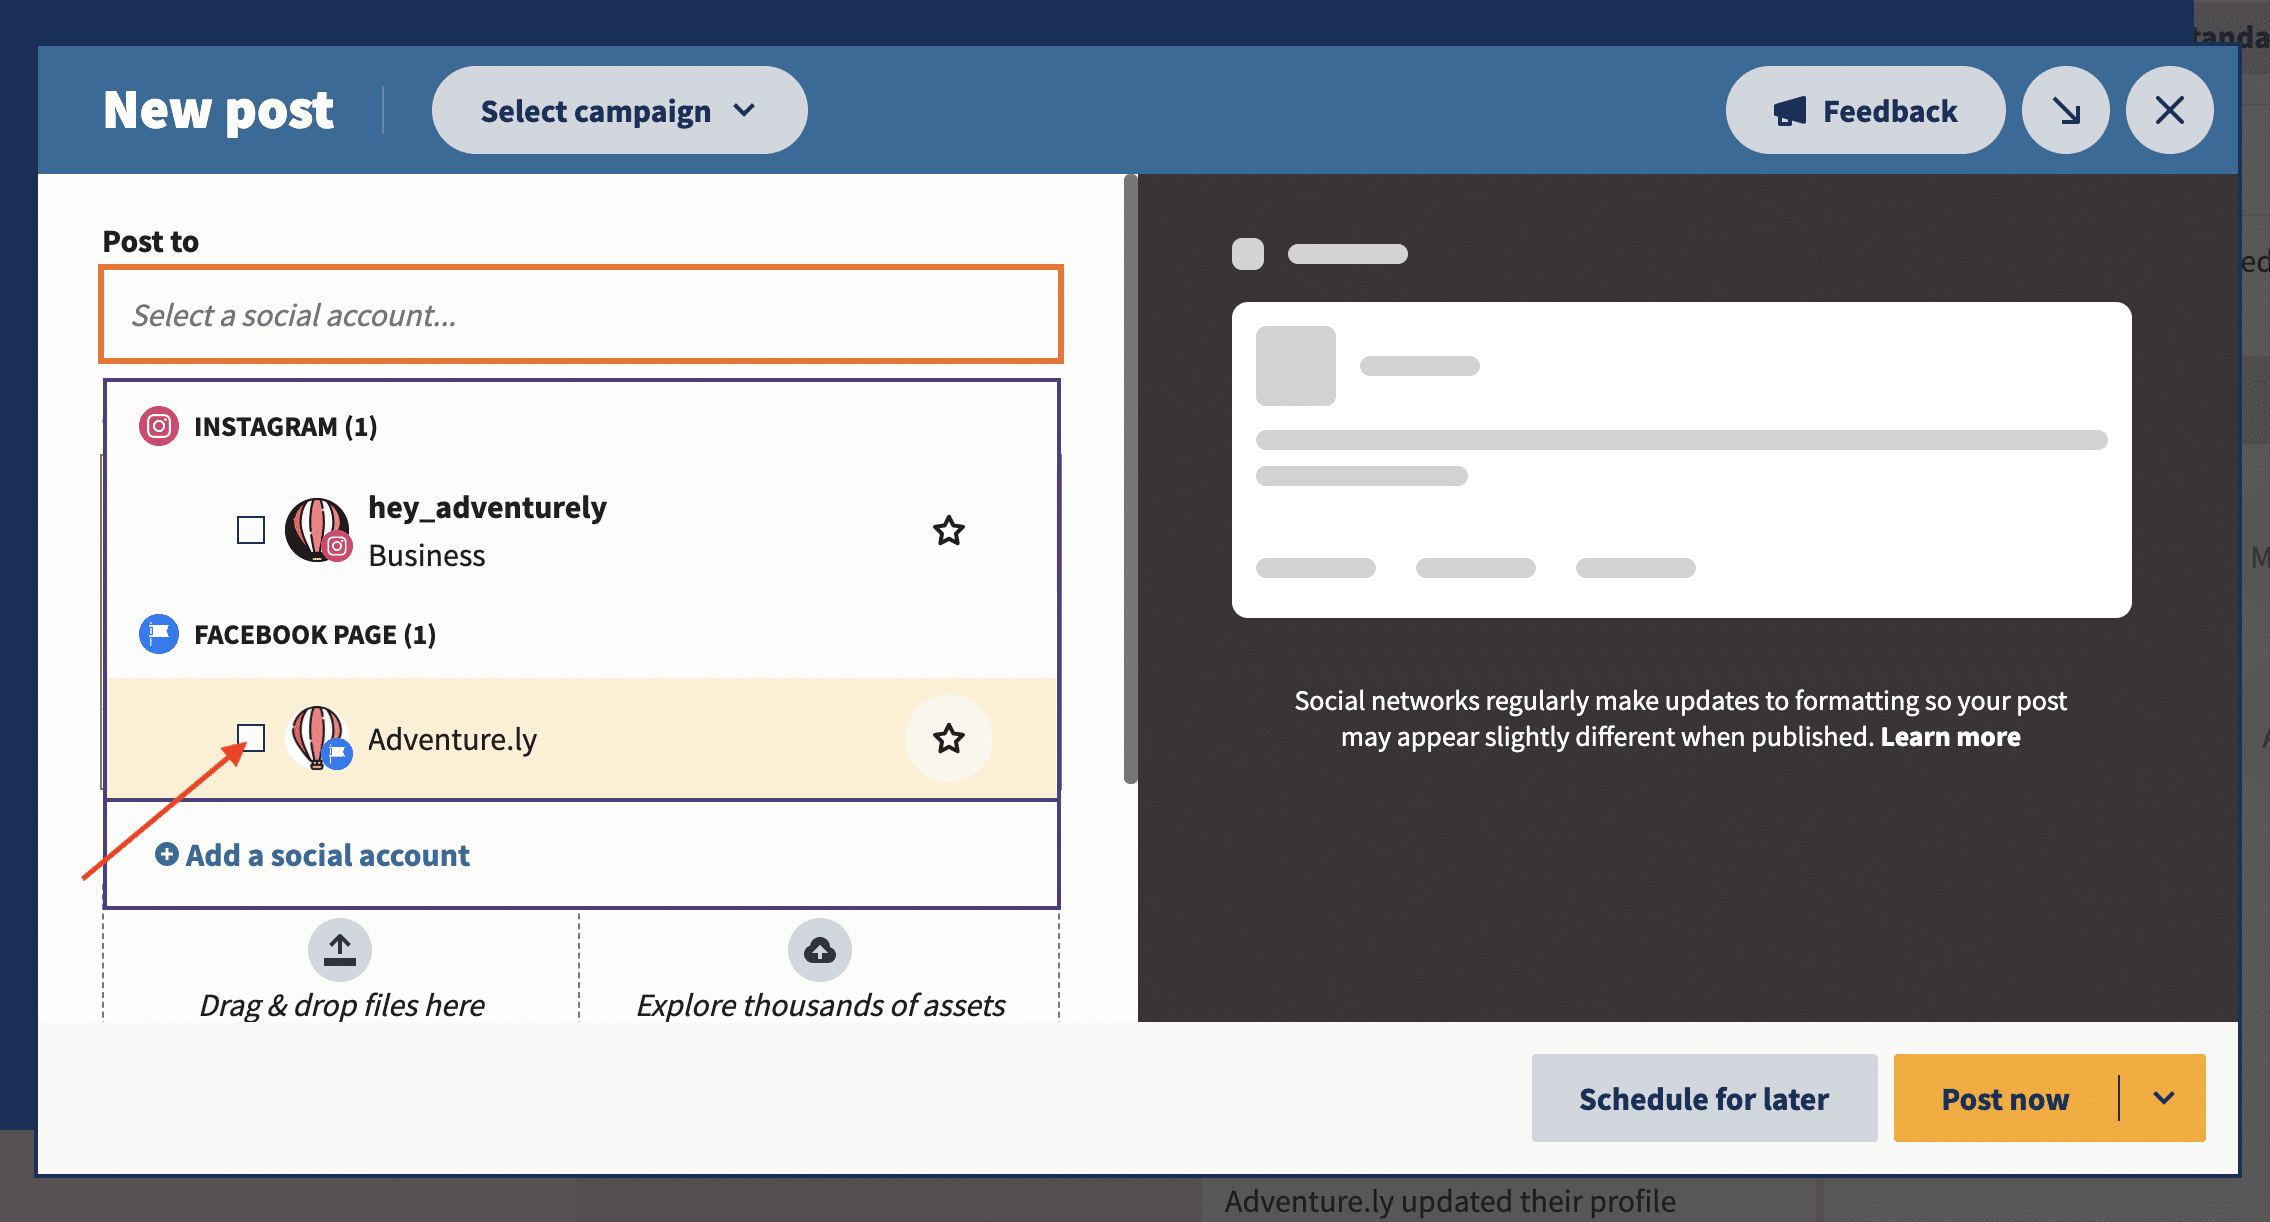
Step 2: Select the Facebook Page you want to publish to
Check the box next to the correct Facebook account.
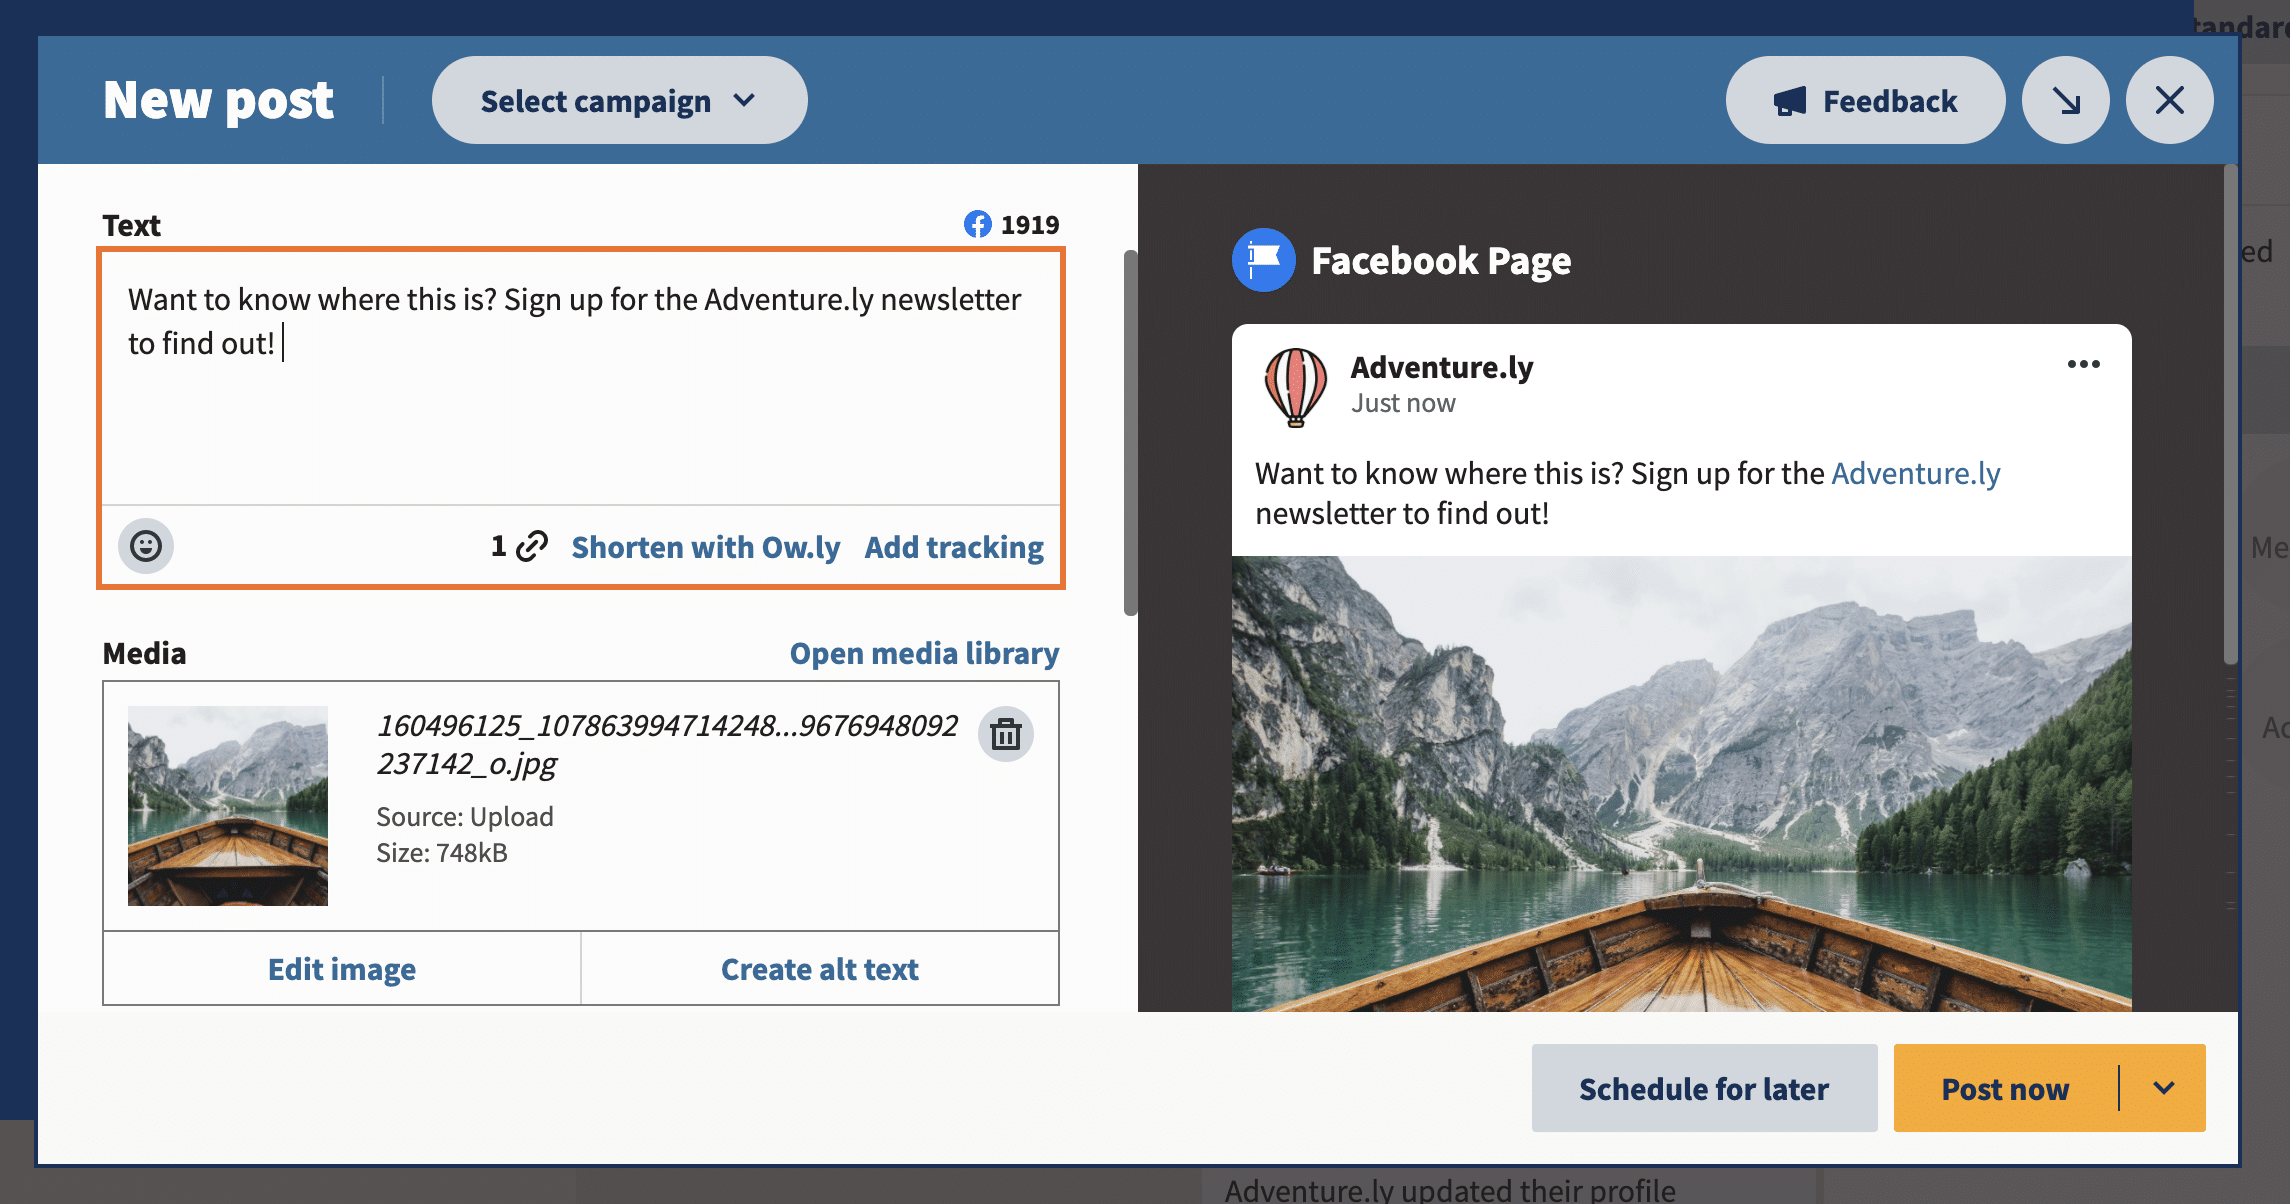
Step 3: Create your post
Write the text, add and edit your image, and add a link.
Step 4: Schedule a publication time
Tap Schedule for later. This will bring up a calendar. Choose the date and time you want the Facebook post to be published.
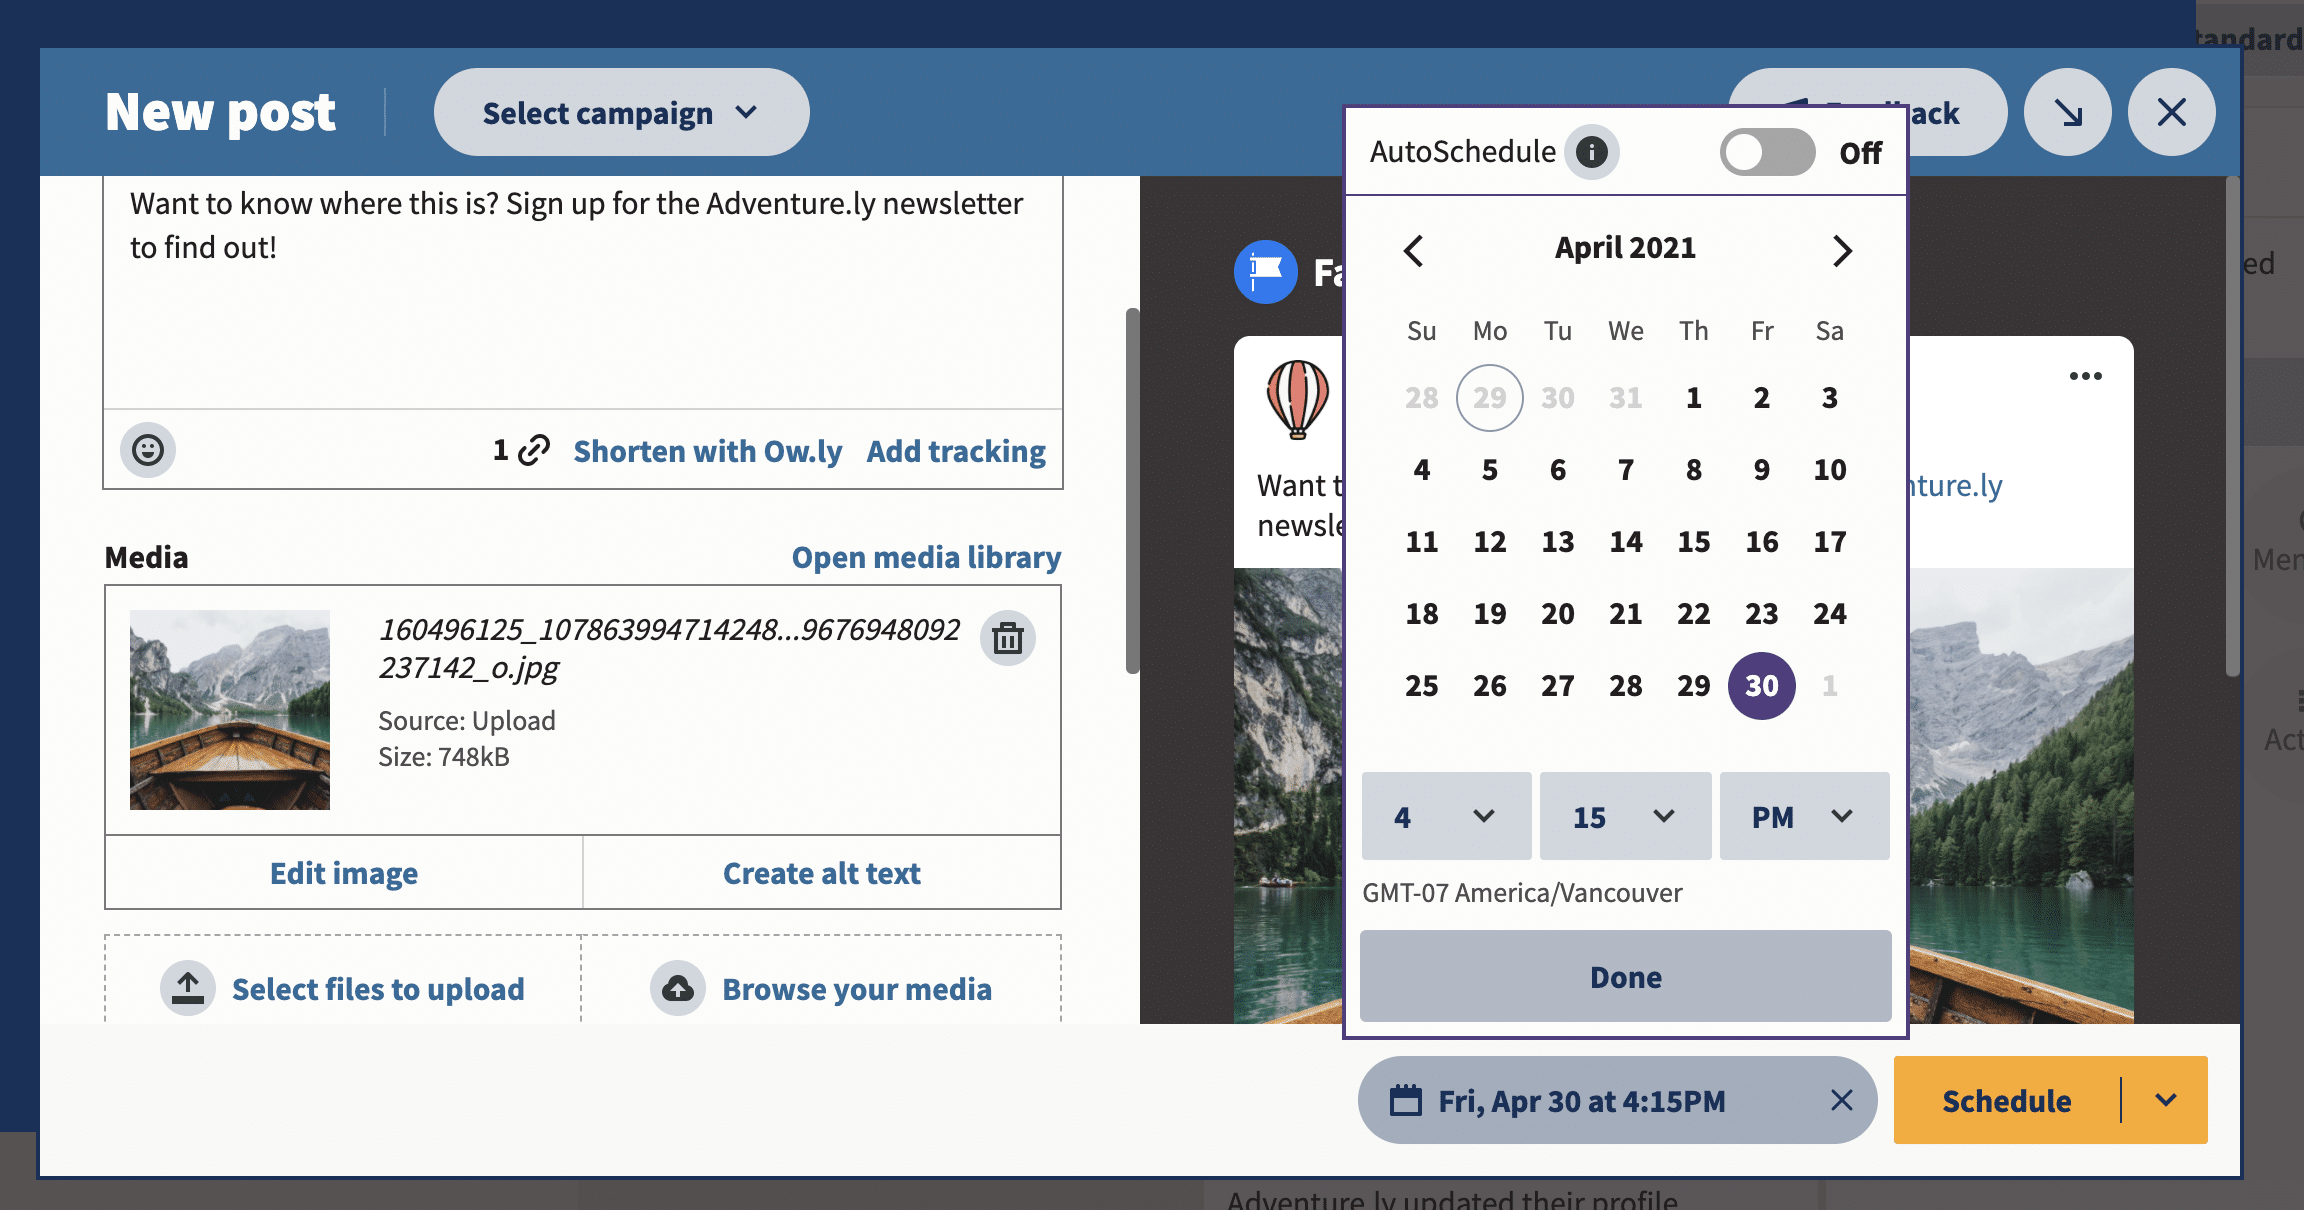
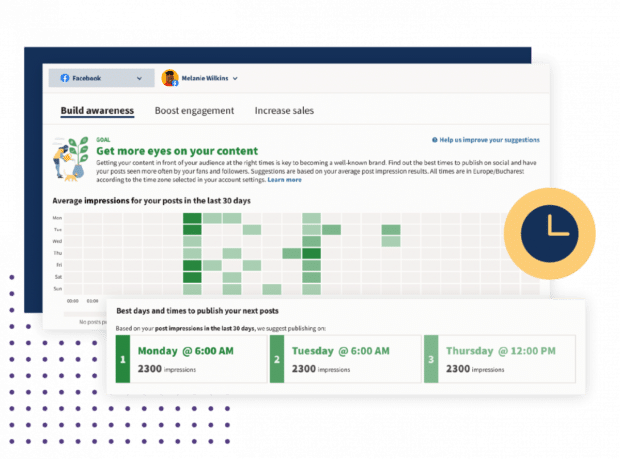
Hootsuite’s Facebook scheduling app makes it easy to post at the best times to generate high engagement.
The Best Time to Publish looks at your past engagement data to suggest optimal times to post on every network, not just Facebook!
(If you’d like to learn more, check out how the Best Time to Publish feature works for Hootsuite’s own social channels.)
Step 5: Schedule your Facebook post
Click the Schedule button, and your post will be published at the exact time you set.
How to schedule multiple Facebook posts at once in Hootsuite
Hootsuite’s bulk schedule tool makes handling a busy posting schedule more efficient. The tool lets you schedule a maximum of 350 posts at once.
To schedule multiple Facebook posts, save your Facebook content as a CSV file.
Include these details for each post:
- The date and time (using 24-hour time) that your post should publish.
- The caption.
- A URL (this is optional).
Note that you can’t add emojis, images or videos to bulk posts. But you can include those afterward by editing each individual scheduled post in Hootsuite.
After you upload your CSV file, the Bulk Composer asks you to review all the posts. Once you’ve made your edits and uploaded any additional media files, select Schedule.
Don’t forget that you can edit individual posts afterward in Hootsuite’s Publisher (in the Planner and Content tab).
Learn more about Hootsuite’s bulk scheduling tool here:
How to auto-schedule Facebook posts in Hootsuite
With Hootsuite’s AutoSchedule feature, you can avoid gaps in your social media calendar. The tool will automatically schedule your posts for publication at optimal, high-engagement times. Instead of manually testing different post times when scheduling your Facebook posts, let us do the math for you!
Here’s how to use the auto-scheduling feature:
Step 1: Compose your post
Create your post as usual: write a caption, add and edit your image, and add a link.
Step 2: Click Schedule for later
This will bring up the scheduling calendar. Instead of manually selecting when your post should go live, navigate to the AutoSchedule option just above the calendar.
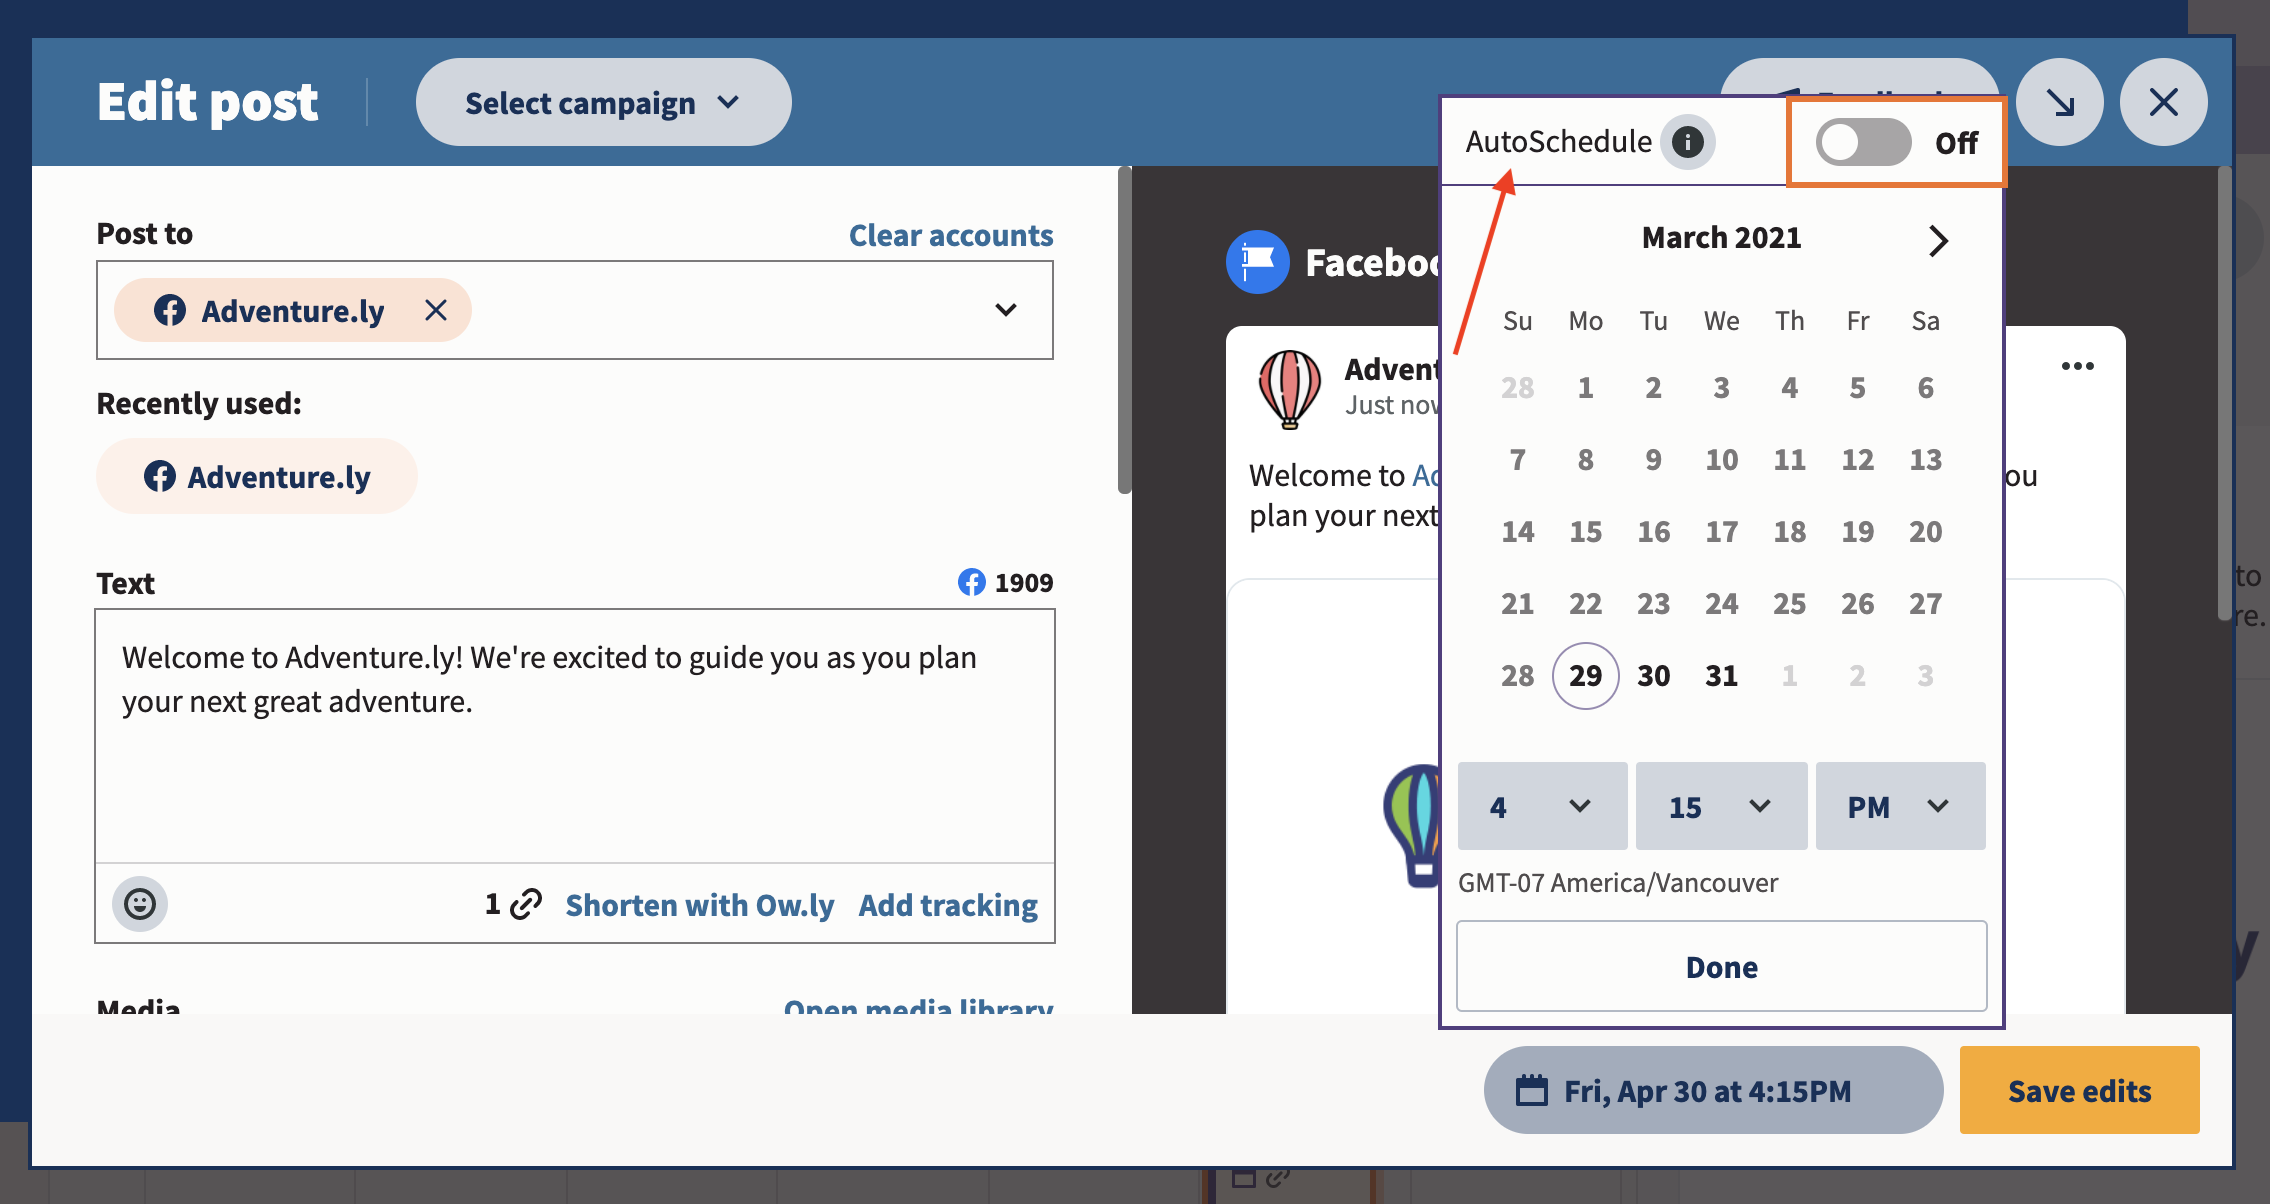
Step 3: Turn the AutoSchedule toggle to On

Then, click Done. You can sit back and relax — AutoSchedule is enabled!
How to view and edit scheduled Facebook posts in Hootsuite
Step 1: Navigate to the Publisher
Head to the Publisher section of your dashboard (use the calendar icon in the left-hand side menu).
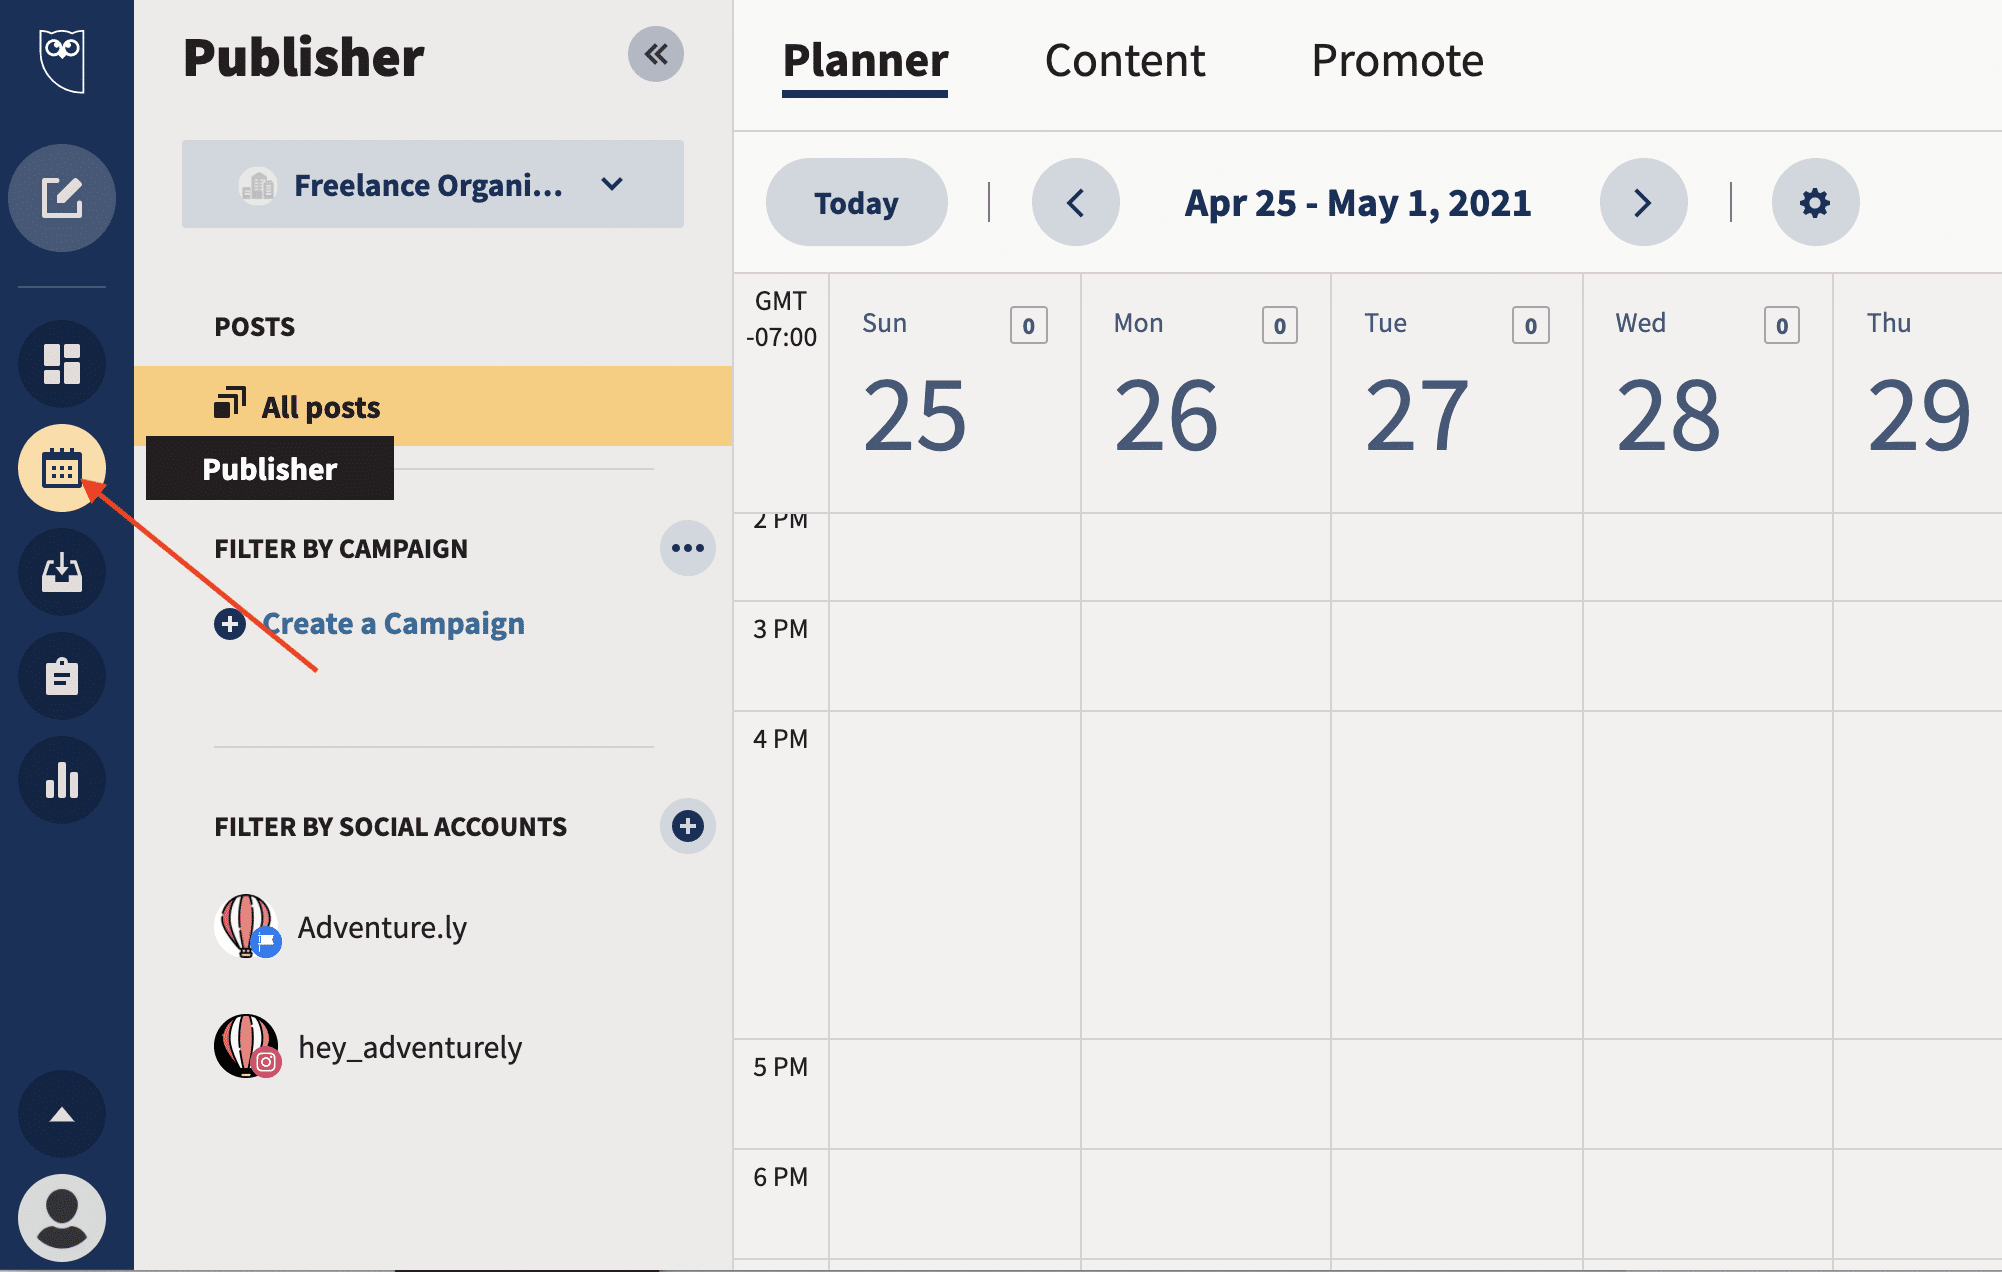
Step 2: Go to the Planner or Content tab
Both tabs will take you to your scheduled posts.
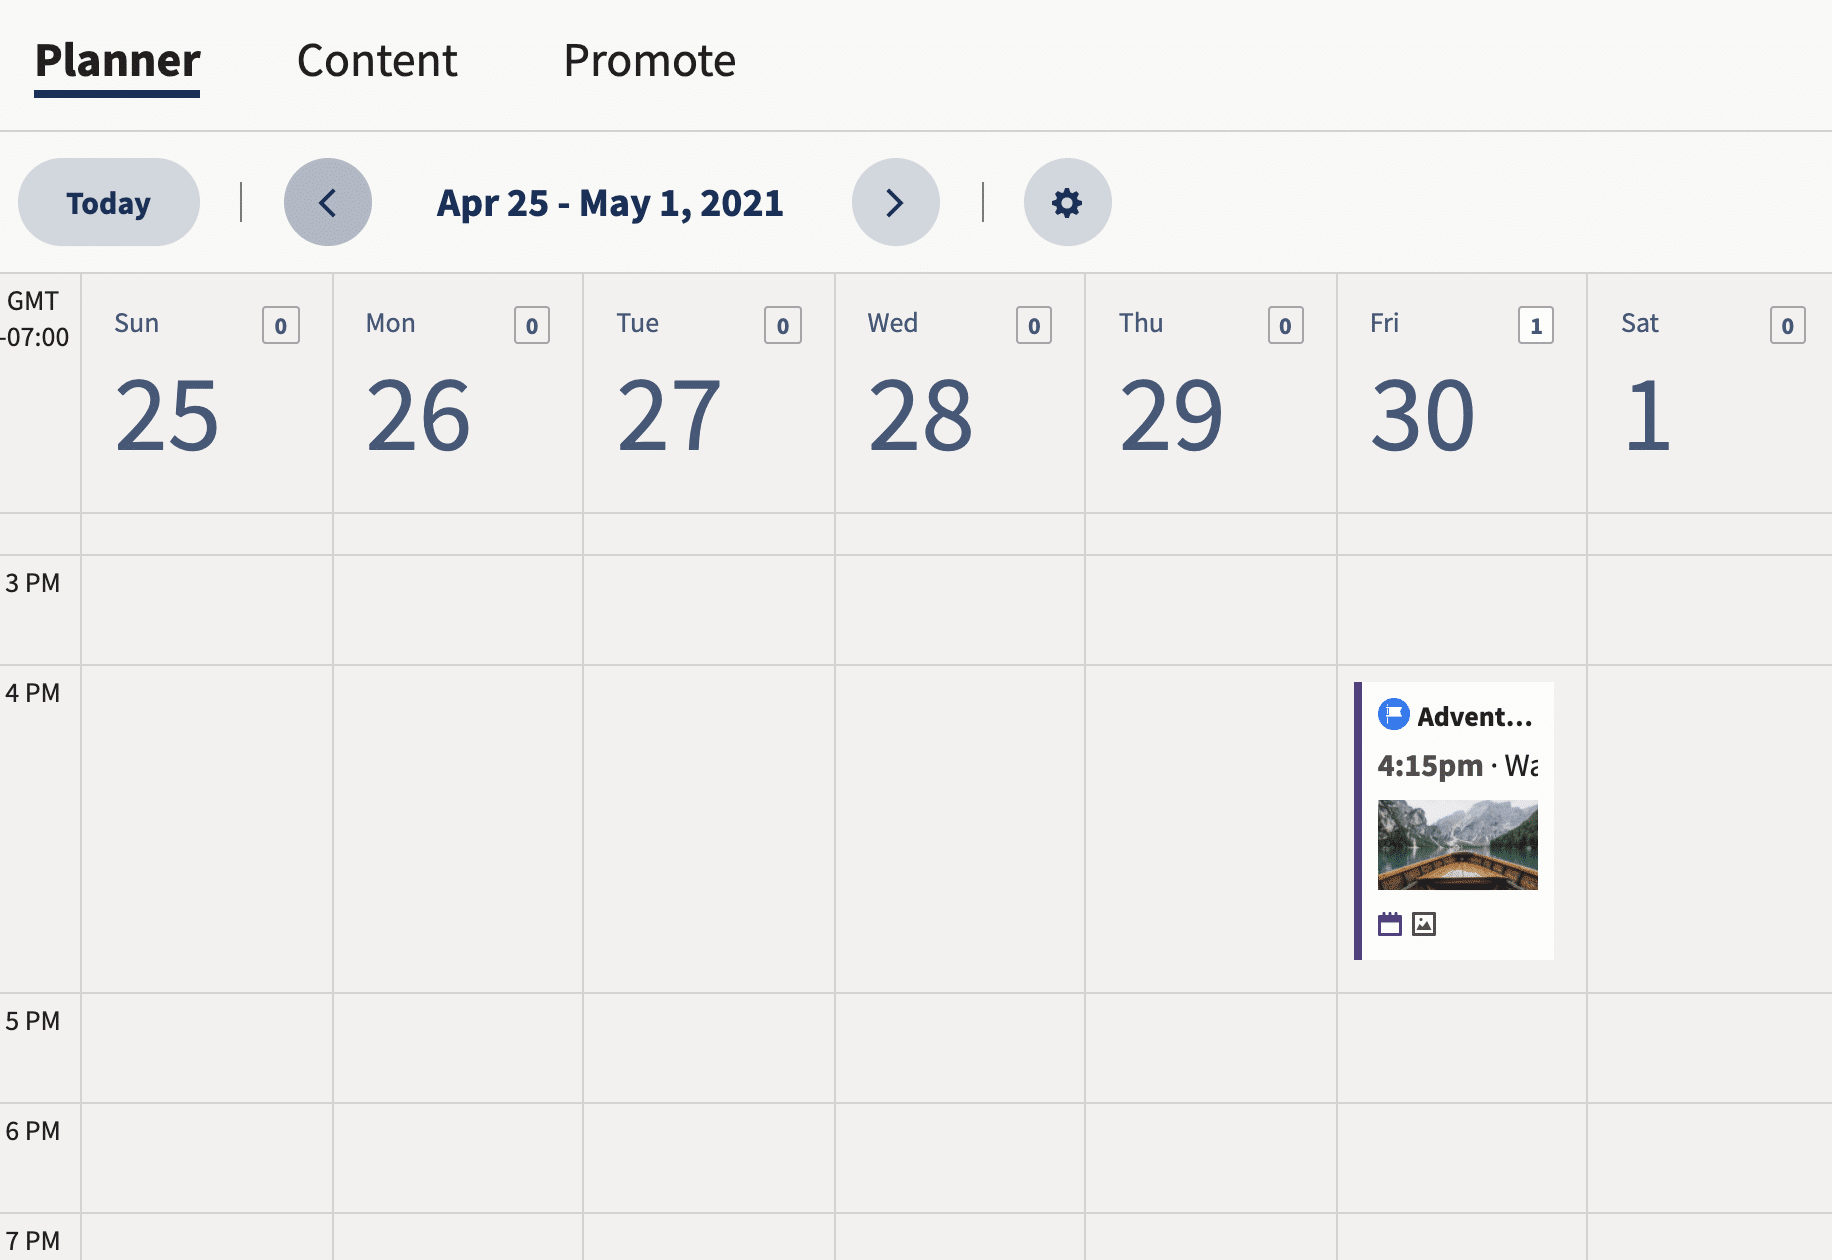
If you’re a visual person, Planner offers a handy way to get a sense of your upcoming content. It gives you a calendar view of your scheduled posts:
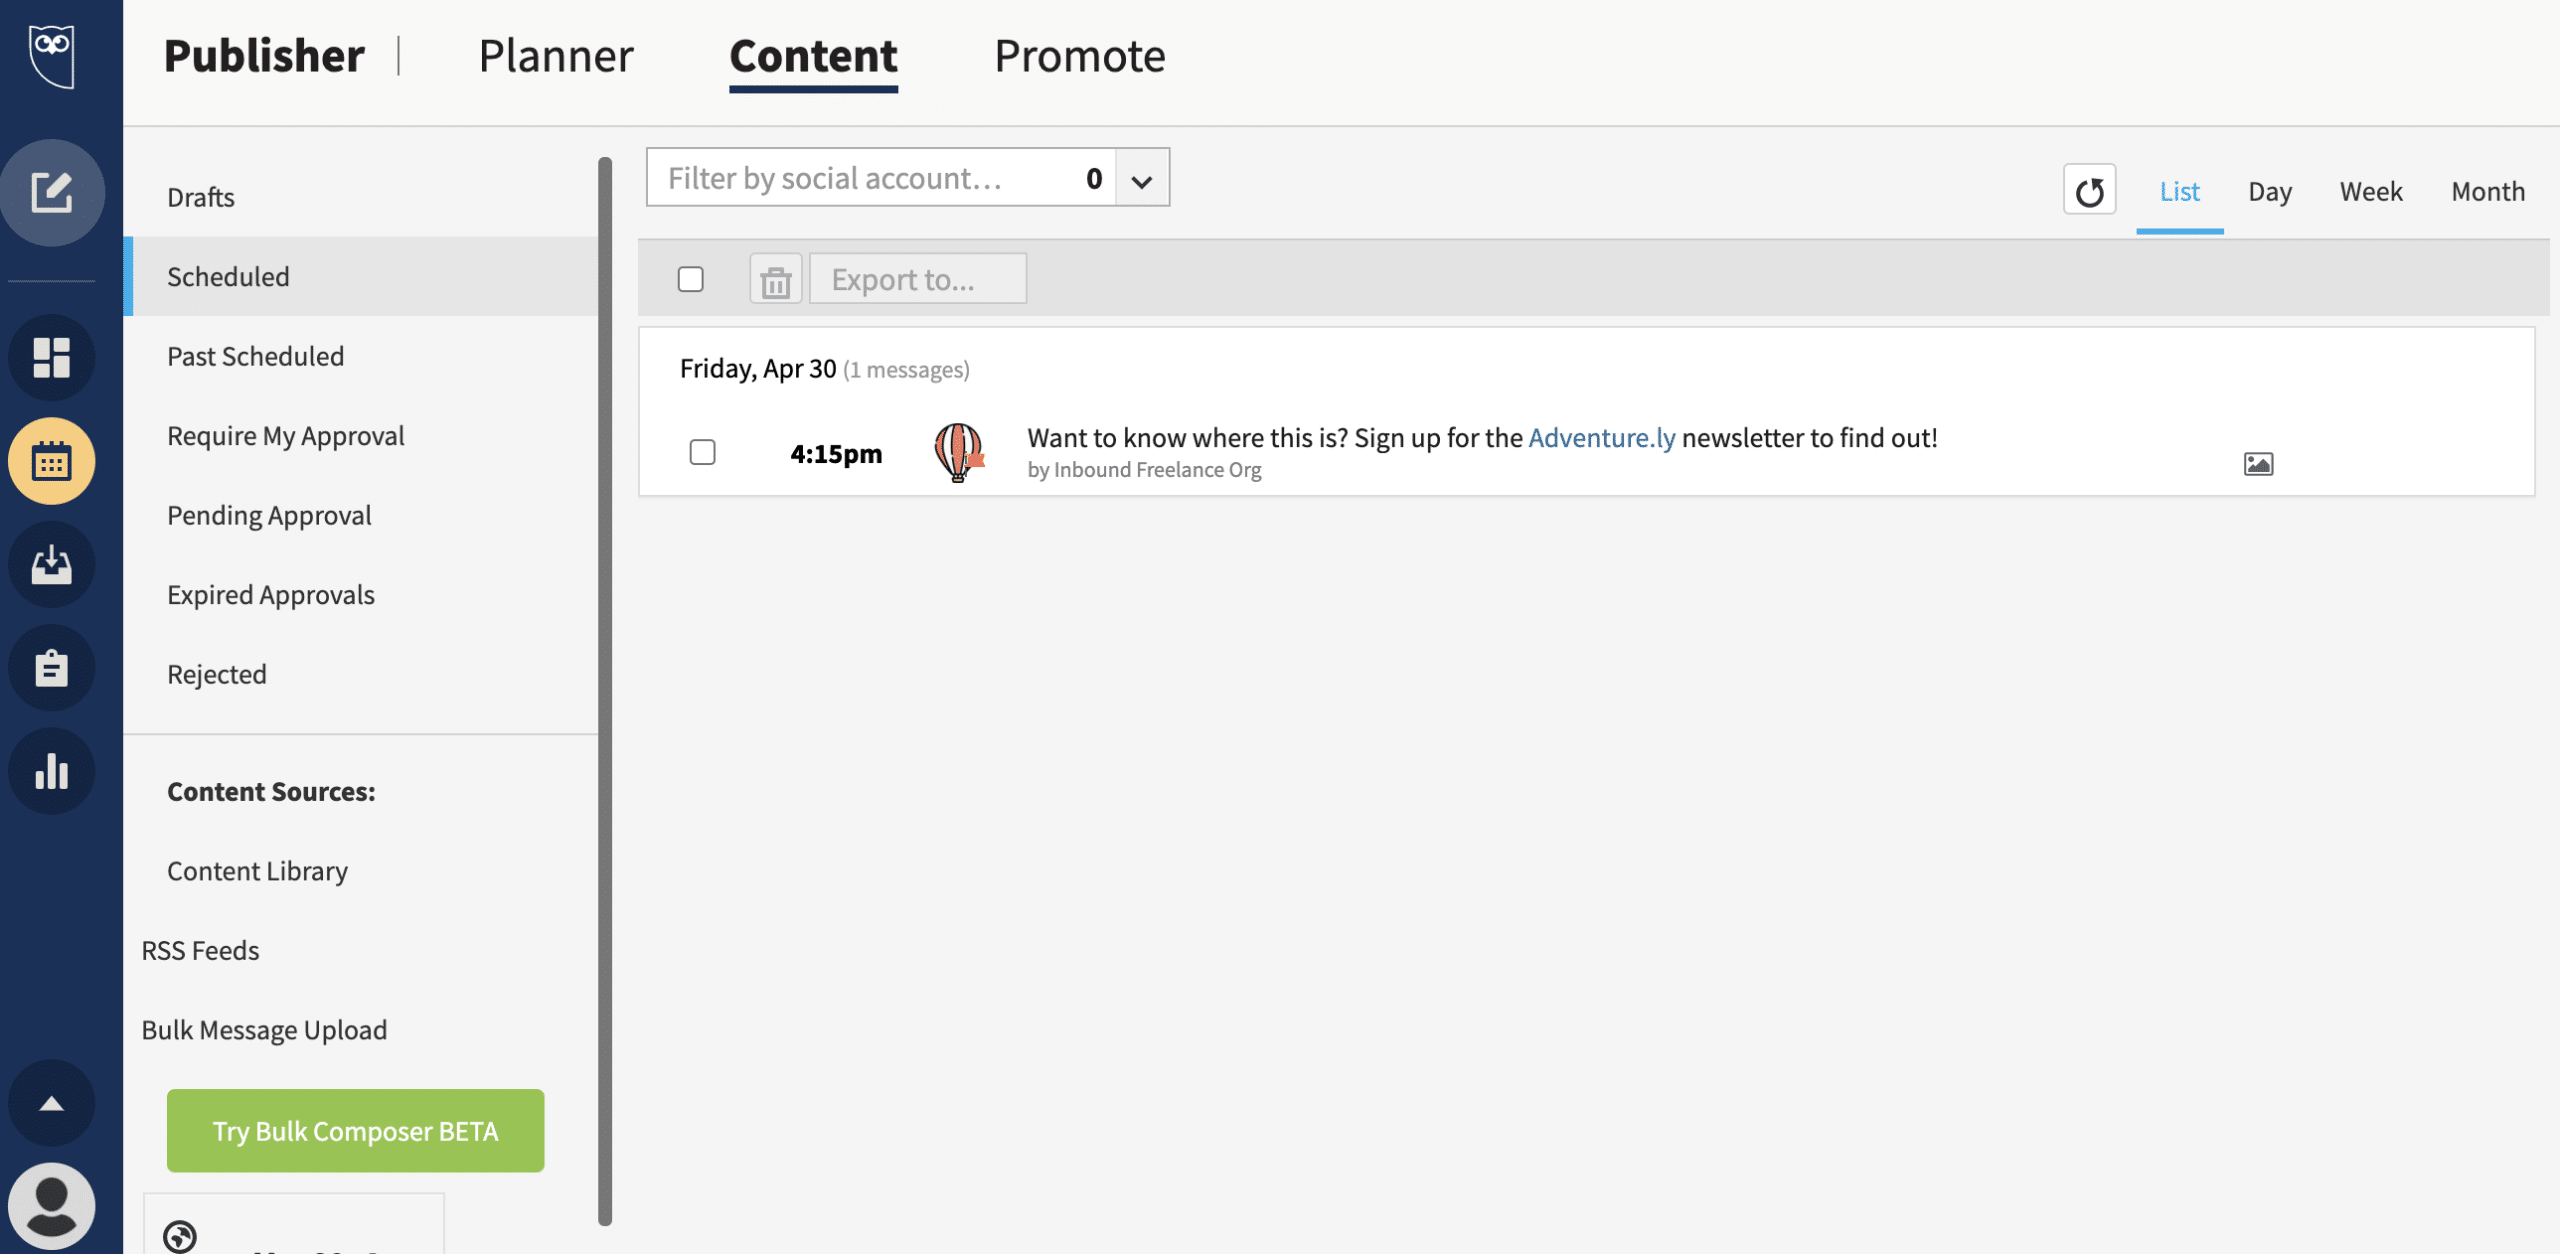
The Content tab shows you the same information but uses a list. Both views work for editing and rescheduling posts. The one you choose is up to your personal preference.
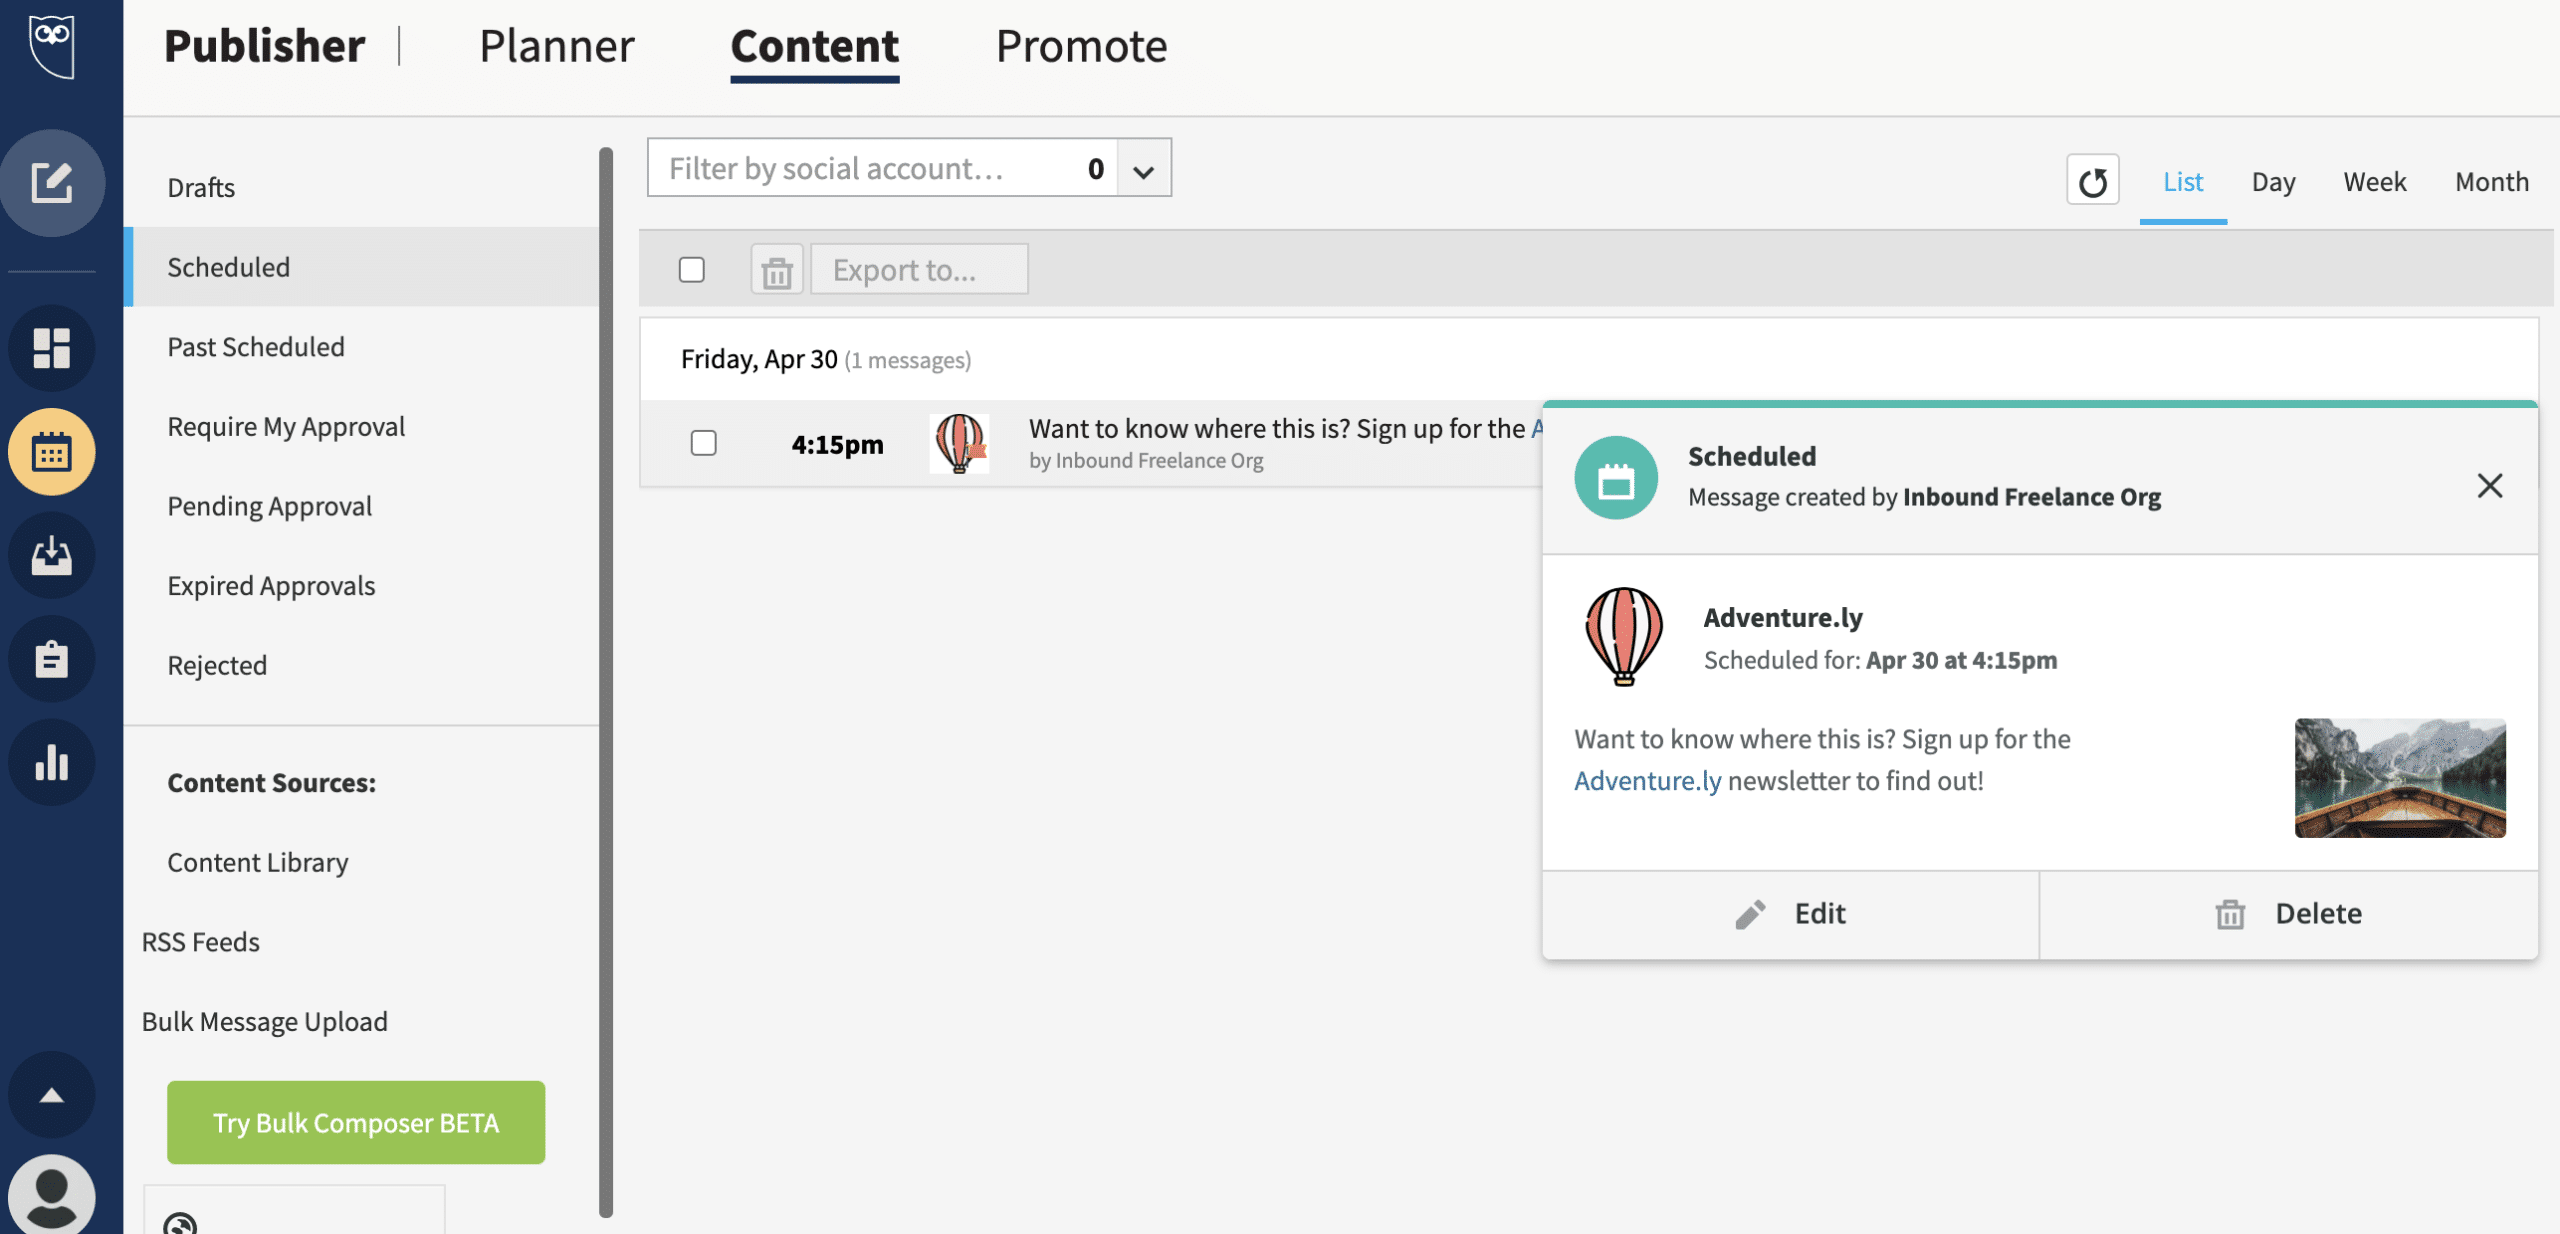
Step 3: Click on the post you want to edit
Here’s how this looks in the Content tab:
Step 4: Edit your scheduled post
At the bottom of the post, you have the option to either Edit or Delete your post.
To open your post and make edits, click Edit. Here, you can reschedule your post or edit its contents. Once you’re done, just click Save Edits.
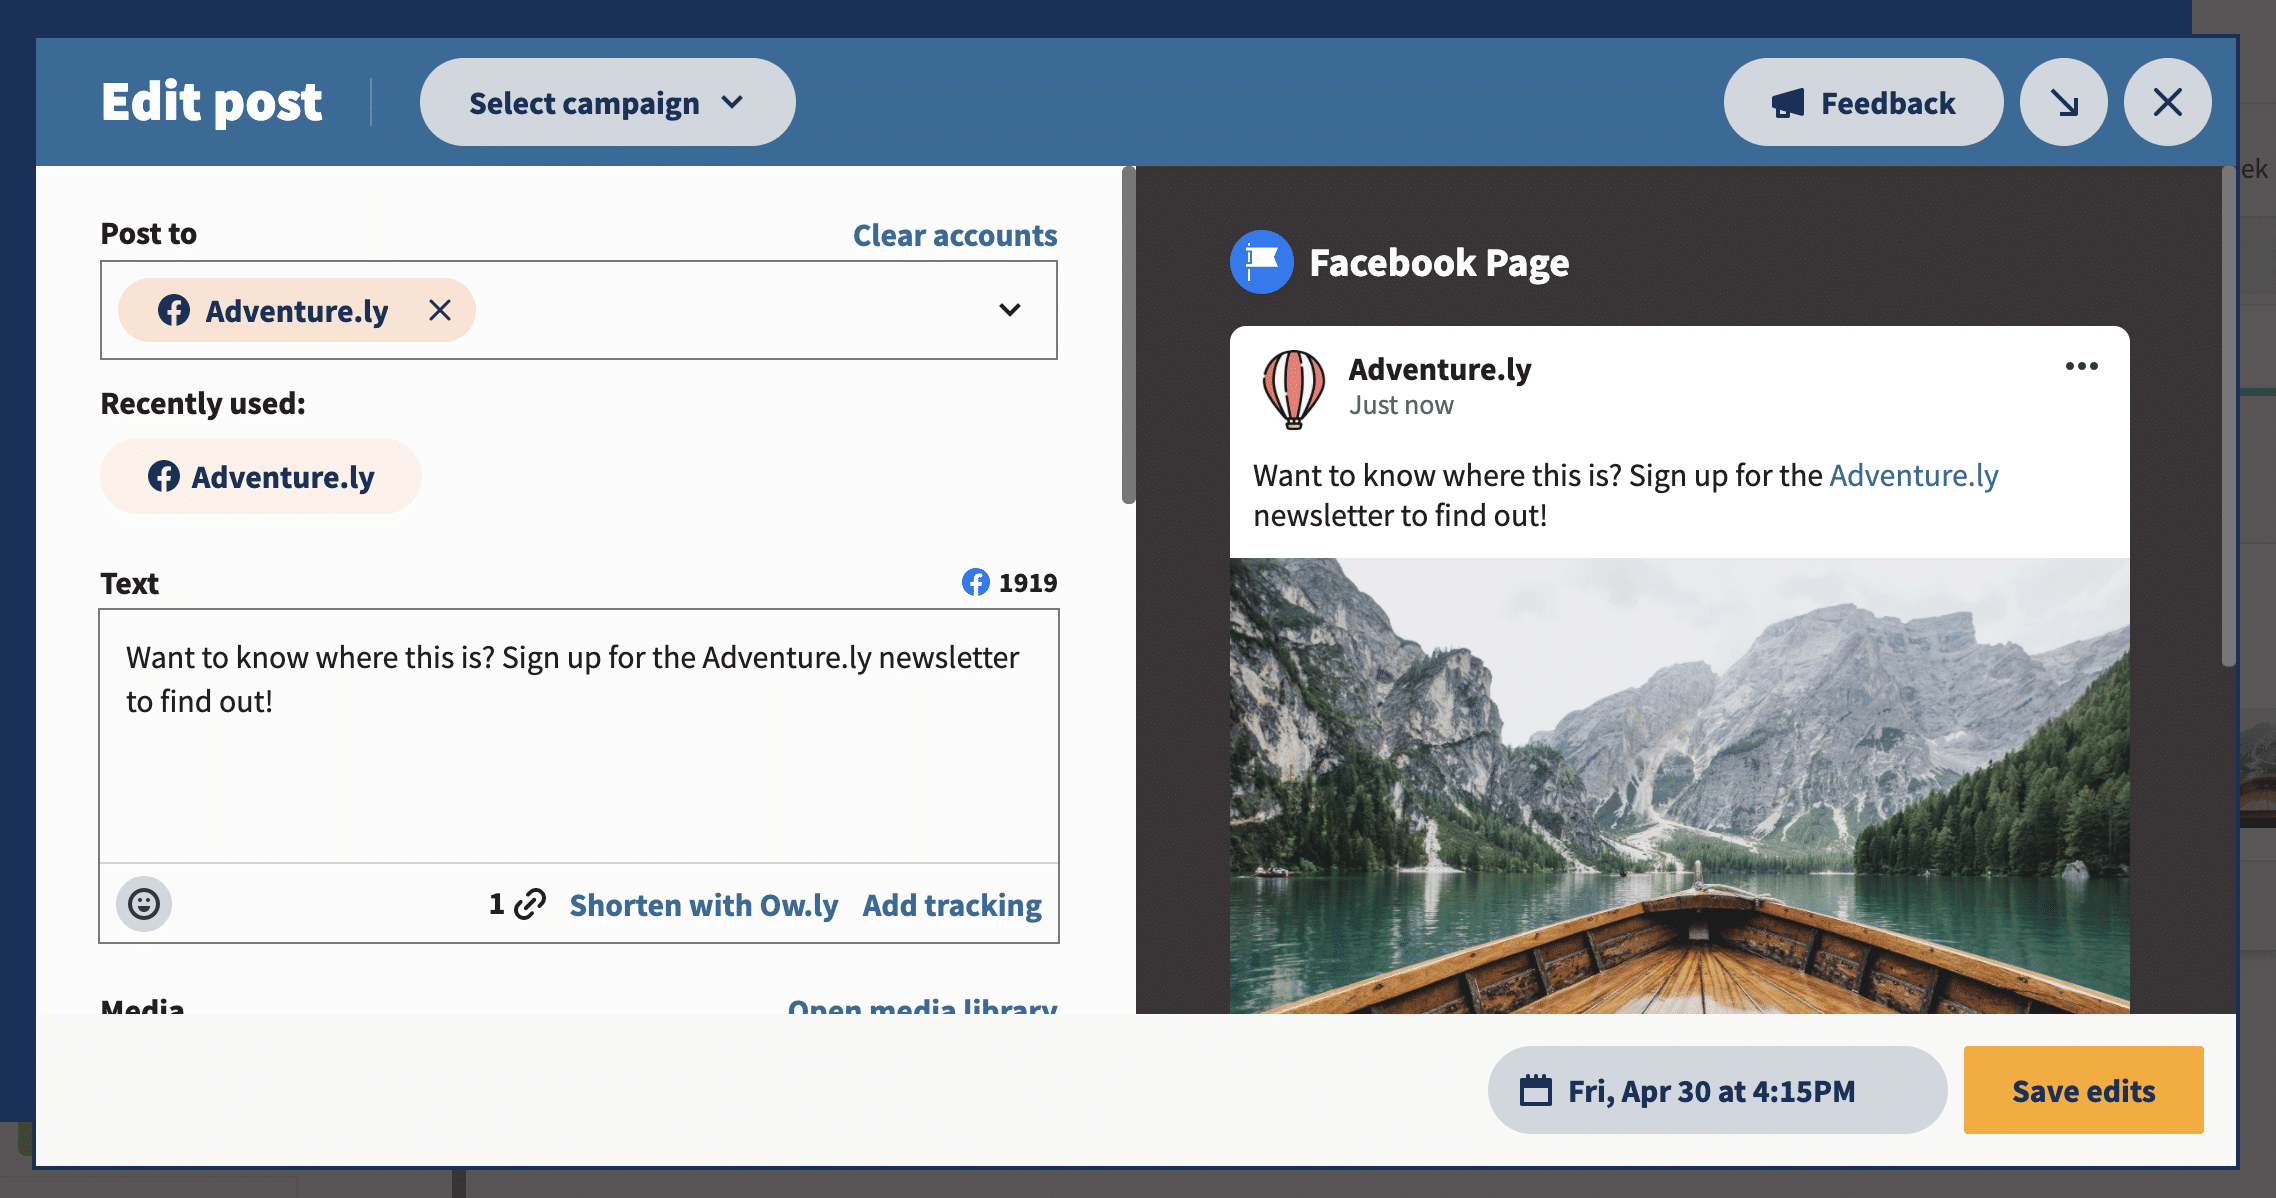
The Delete button will erase the post from your content queue.
Hootsuite vs. Facebook Business Suite
If you want to schedule and automatically post content to Facebook and Instagram, as well as TikTok, Twitter, LinkedIn, YouTube and Pinterest, Hootsuite is a great choice. It’s easy to use, and it comes with many useful collaboration features for teams. You can also use Hootsuite for social media analytics, social listening, and answering all of your comments and DMs from one place.
Here’s how Hootsuite compares to Facebook Business Suite:
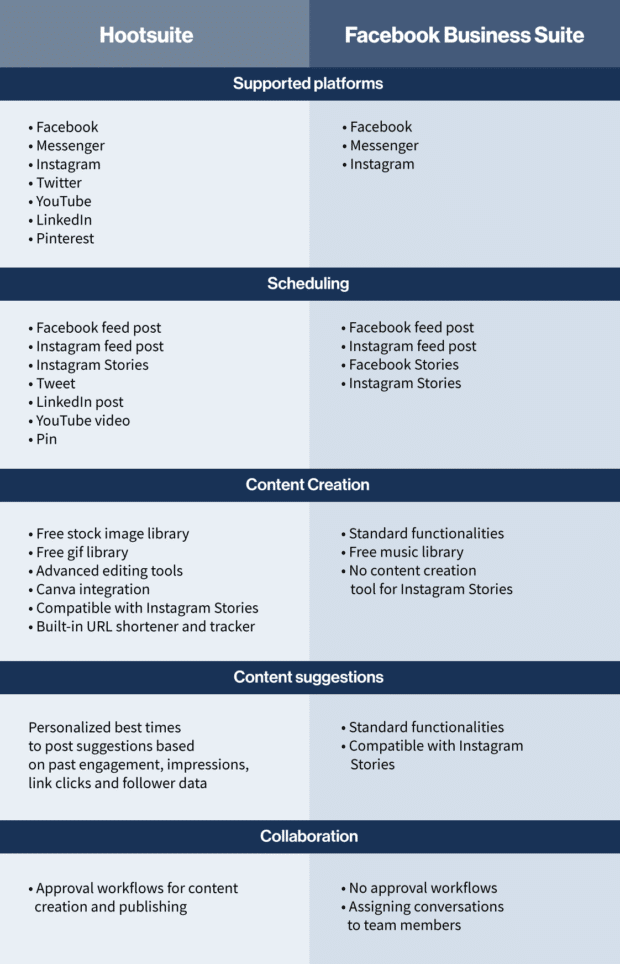
Hootsuite’s Facebook scheduler also has a Best Time to Publish feature that gives you personalized recommendations for when you should post based on your account’s historical performance. Just choose the goals that matter most to you (building brand awareness, boosting engagement or increasing sales). Then, Hootsuite’s scheduler suggests post times that can help you boost visibility and performance.
With Hootsuite, you can also bulk-schedule up to 350 posts at once. Think of all the time this could save you!
5 tips for scheduling Facebook posts
Whether you schedule Facebook posts on an app like Hootsuite or directly on the platform, you should follow these best practices:
1. Always stay on brand
When scheduling posts, the pressure to post immediately is off. So take the time to craft relevant content that will land with your audience.
Scheduling posts can also give you time to make sure your brand guidelines are followed when composing weeks or months worth of content. Make sure that your campaigns across Pages and even social networks are aligned with yours and your audience’s values.
2. Carefully choose the publication date and time
Avoid posting when your audience isn’t online. Hootsuite’s Facebook scheduler comes with a Best Time to Publish feature that will help you schedule Facebook posts on days and at times when your audience is active on the platform.
The more people see your Facebook updates, the more opportunity there is to generate engagement, drive traffic and gain potential new followers.
3. Know when to pause your Facebook posts
Don’t forget about the posts you’ve scheduled. Sometimes current events can change the impact of posts you may have scheduled months ago. That means a post may become irrelevant or insensitive in ways you simply could not have predicted.
Regularly check in on your scheduled posts to track what’s coming up. That way, you can pause or delete scheduled posts before they’re published and avoid any potential backlash.
4. Remember that you can’t schedule everything
Some things you have to post about in real-time. And some types of posts cannot be scheduled at all. On Facebook, these include:
- Facebook events
- Facebook check-ins
- Photo albums
If you want to schedule Facebook messages, you may want to look into an automation tool. Facebook messenger bots use conversational AI to send messages that reach customers even if your support team is offline.
5. Track analytics and engagement
A good posting schedule shouldn’t be based on guesswork. You’ll know what works best for your Facebook audience by monitoring your performance in a social media analytics tool.
Historical data will show you what posts perform well and where you could make improvements.
Use Hootsuite to schedule all of your social media posts, engage with your followers, and track the success of your efforts. Sign up today.
Easily manage your Facebook page (+ other social media accounts) and save time with Hootsuite. Schedule, engage, analyze, perform.
The post How To Schedule Posts on Facebook [Top Tools + Tips] appeared first on Social Media Marketing & Management Dashboard.